Scheduled tasks are only for recurring tasks. If you want to trigger a one-off task at a future
time, you should use the delay option.
Defining a scheduled task
This task will run when any of the attached schedules trigger. They have a predefined payload with some useful properties:timestamp- the time the task was scheduled to run, as a UTC date.lastTimestamp- the time the task was last run, as a UTC date.timezone- the timezone the schedule was registered with, defaults to “UTC”. In IANA format, e.g. “America/New_York”.scheduleId- the id of the schedule that triggered the taskexternalId- the external id you (optionally) provided when creating the scheduleupcoming- the next 5 times the task is scheduled to run
This task will NOT get triggered on a schedule until you attach a schedule to it. Read on for how
to do that.
How to attach a schedule
Now that we’ve defined a scheduled task, we need to define when it will actually run. To do this we need to attach one or more schedules. There are two ways of doing this:- Declarative: defined on your
schedules.task. They sync when you run the dev command or deploy. - Imperative: created from the dashboard or by using the imperative SDK functions like
schedules.create().
A scheduled task can have multiple schedules attached to it, including a declarative schedule
and/or many imperative schedules.
Declarative schedules
These sync when you run the dev or deploy commands. To create them you add thecron property to your schedules.task(). This property is optional and is only used if you want to add a declarative schedule to your task:
cron property it will be updated when you run these commands. You can view your synced schedules in the dashboard: open the task on the Tasks page and check its “Schedules” tab.
Imperative schedules
Alternatively you can explicitly attach schedules to aschedules.task. You can do this in the dashboard from the scheduled task’s page by pressing the “Create schedule” button, or you can use the SDK to create schedules.
The advantage of imperative schedules is that they can be created dynamically, for example, you could create a schedule for each user in your database. They can also be activated, disabled, edited, and deleted without deploying new code by using the SDK or dashboard.
To use imperative schedules you need to do two things:
- Define a task in your code using
schedules.task(). - Attach 1+ schedules to the task either using the dashboard or the SDK.
Supported cron syntax
When schedules won’t trigger
There are two situations when a scheduled task won’t trigger:- For Dev environments scheduled tasks will only trigger if you’re running the dev CLI.
- For Staging/Production environments scheduled tasks will only trigger if the task is in the current deployment (latest version). We won’t trigger tasks from previous deployments.
Attaching schedules in the dashboard
You need to attach a schedule to a task before it will run on a schedule. You can attach imperative schedules in the dashboard:The Schedules page has moved. There is no longer a standalone “Schedules” page in the
sidebar. Schedules now live on the Tasks page: open a scheduled task to create, view, edit,
enable/disable, and delete its schedules. The old
/schedules URL redirects to the Tasks page.The scheduled task must already exist first — define it in your code with schedules.task() and
sync it to the environment by running the dev or
deploy command so it appears on the Tasks page. A project with no tasks
yet will only show the deploy onboarding.1
Open the scheduled task
In the sidebar select the “Tasks” page, then select the scheduled task you want to attach a
schedule to (scheduled tasks have a clock icon, and you can filter the list to Scheduled).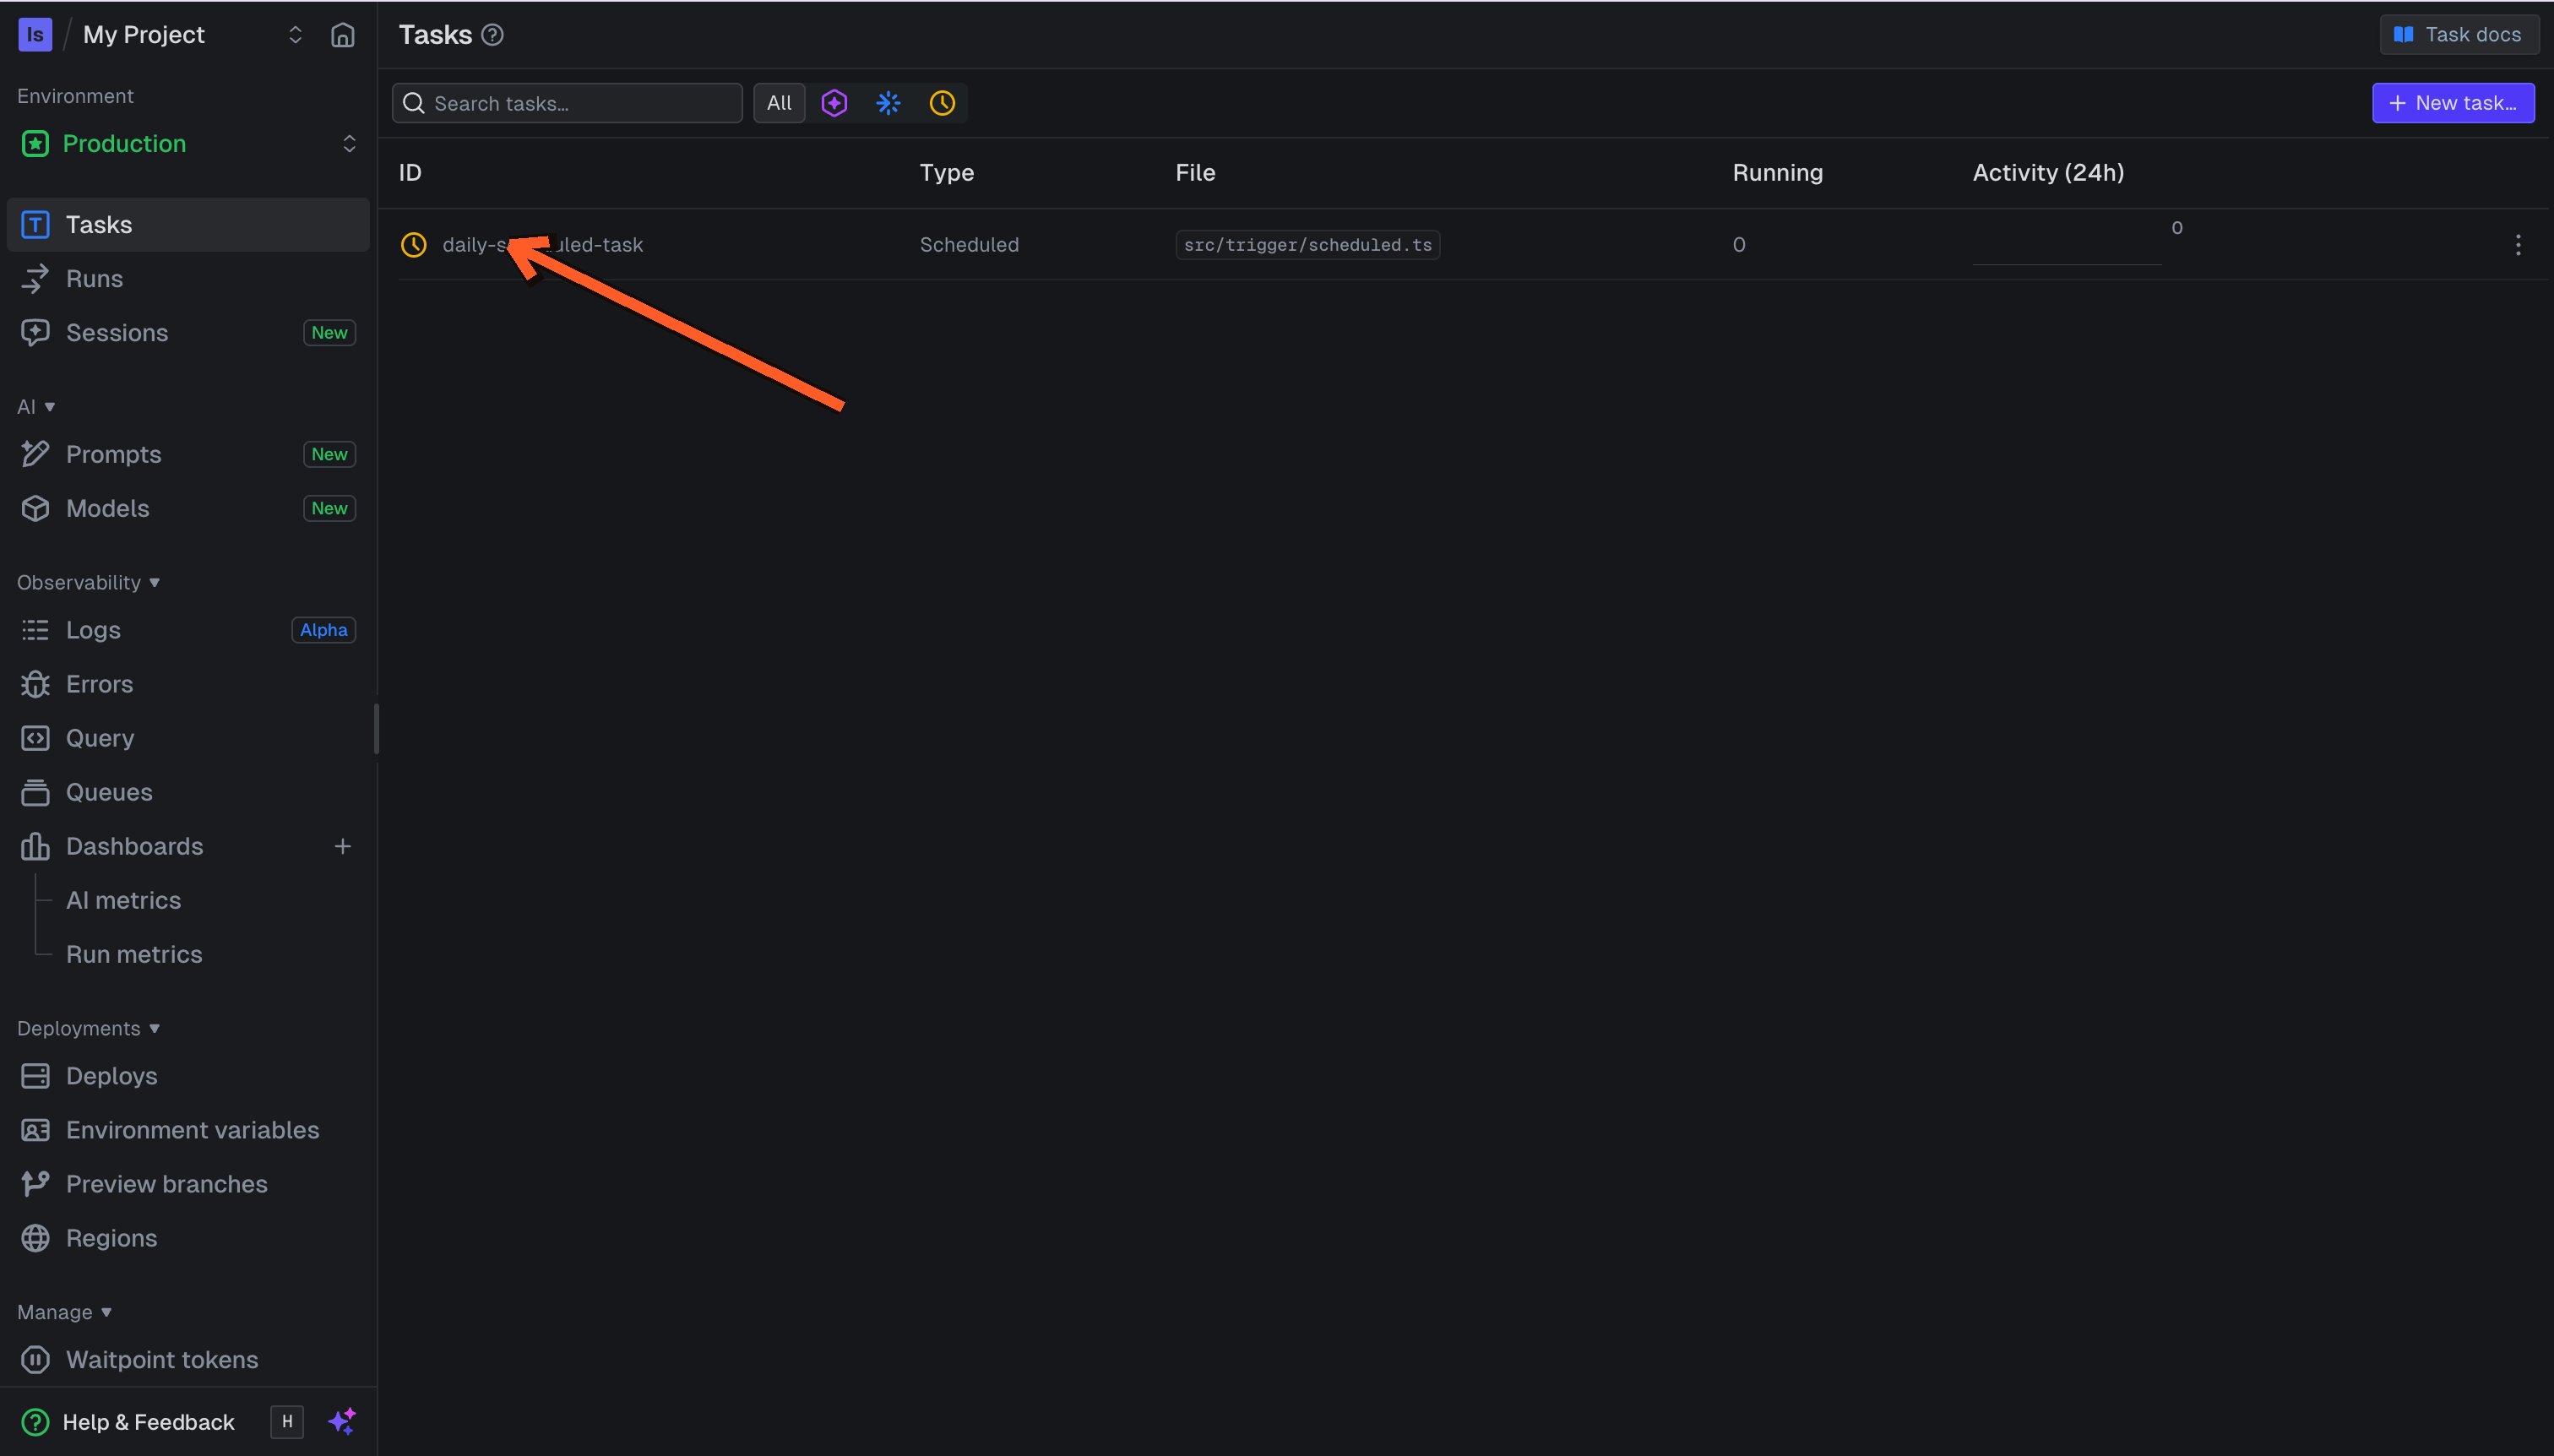
2
Create your schedule
Press the “Create schedule” button, fill in the form, and press “Create schedule” when you’re
done.  These are the options when creating a schedule:
These are the options when creating a schedule:Managing schedules in the dashboard
Open the scheduled task and switch to the “Schedules” tab to see every schedule attached to it — both declarative and imperative — with its type, cron pattern, external id, next and last run, and status. Click a schedule to open the inspector, where you can enable/disable, edit, or delete imperative schedules without deploying new code. Declarative schedules are managed in your code, so they can’t be edited or deleted from here.Attaching schedules with the SDK
You callschedules.create() to create a schedule from your code. Here’s the simplest possible example:
The
task id must be a task that you defined using schedules.task().task, cron, and externalId but only one with the same deduplicationKey.
The deduplication key is per project, not per environment. Using the same key in Production and Staging creates a single schedule; the last create/update decides which environment it appears in. For fixed schedules, prefer declarative (cron on the task). If using imperative across environments, use a different deduplication key per environment (e.g. include the env name in the key).
deduplicationKey. Here’s an example with all the options:
Dynamic schedules (or multi-tenant schedules)
By using theexternalId you can have schedules for your users. This is useful for things like reminders, where you want to have a schedule for each user.
A reminder task:
/trigger/reminder.ts
Next.js API route
Testing schedules
You can test a scheduled task in the dashboard. Note that thescheduleId will always come through as sched_1234 to the run.
There is no longer a standalone “Test” page in the sidebar. You test a task from the task itself —
open it on the Tasks page and press the “Test schedule” button.
1
Open the test page for your task
On the “Tasks” page, open your scheduled task and press the “Test schedule” button.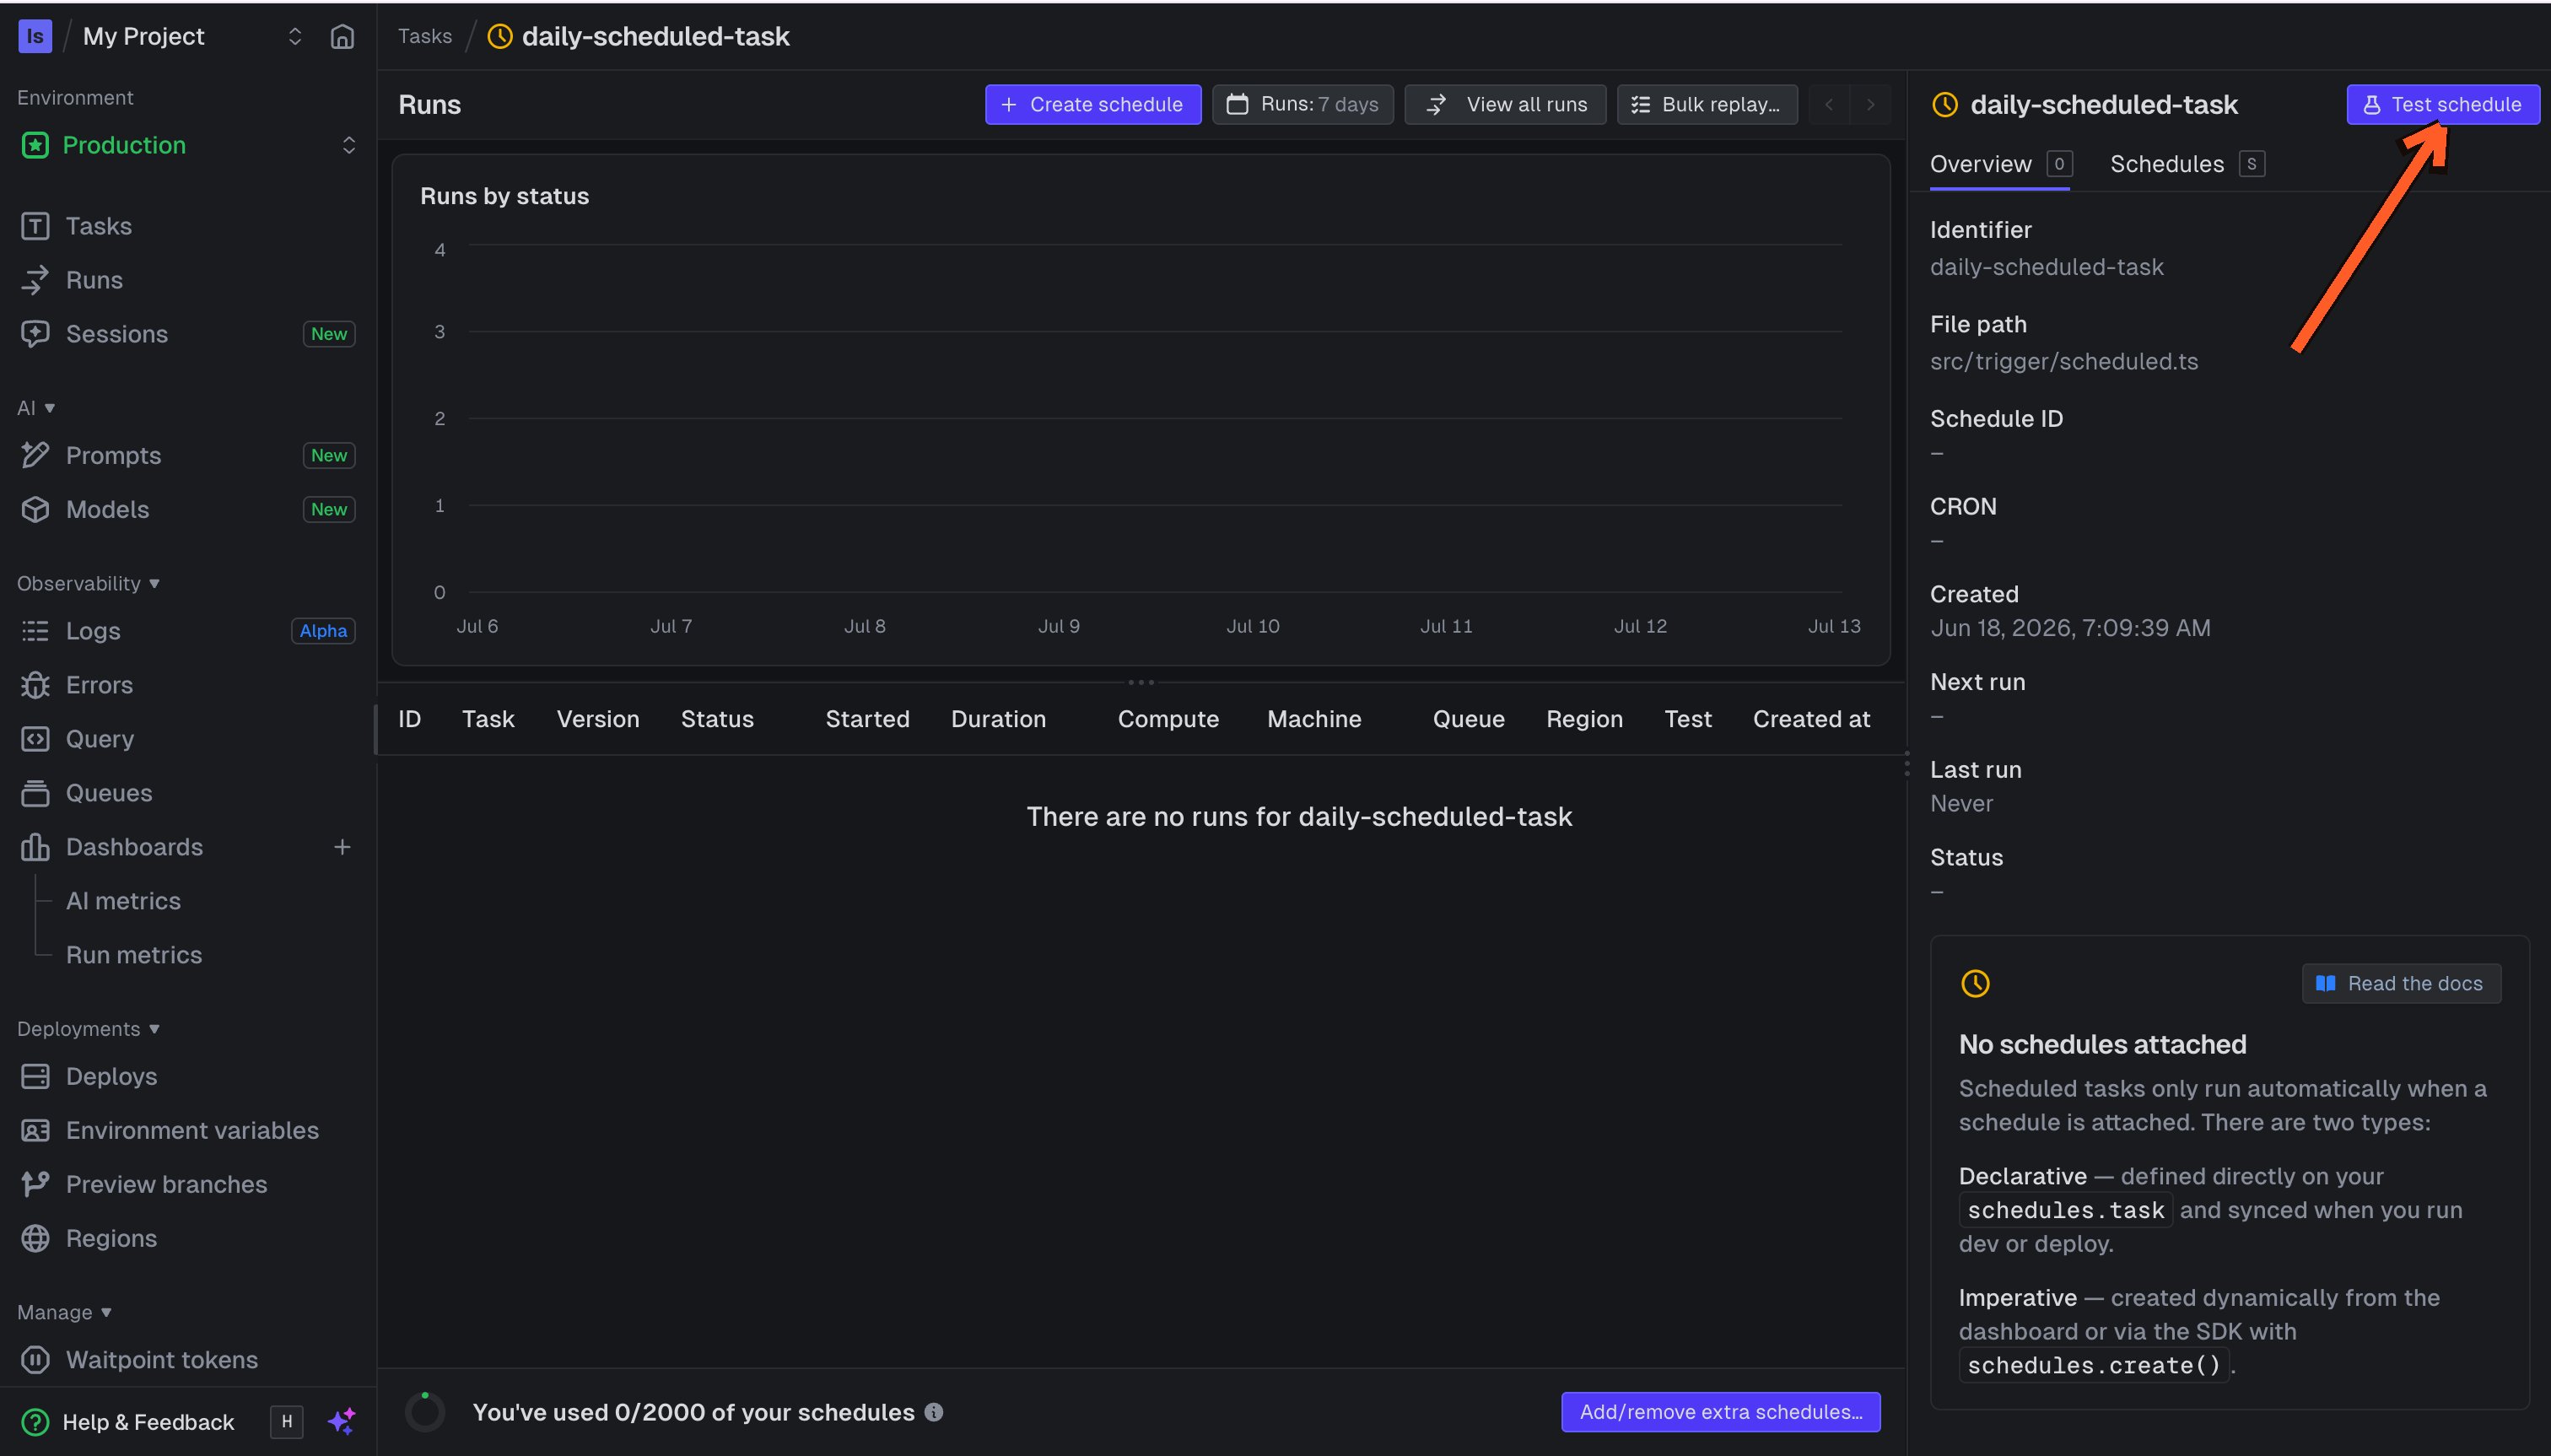
2
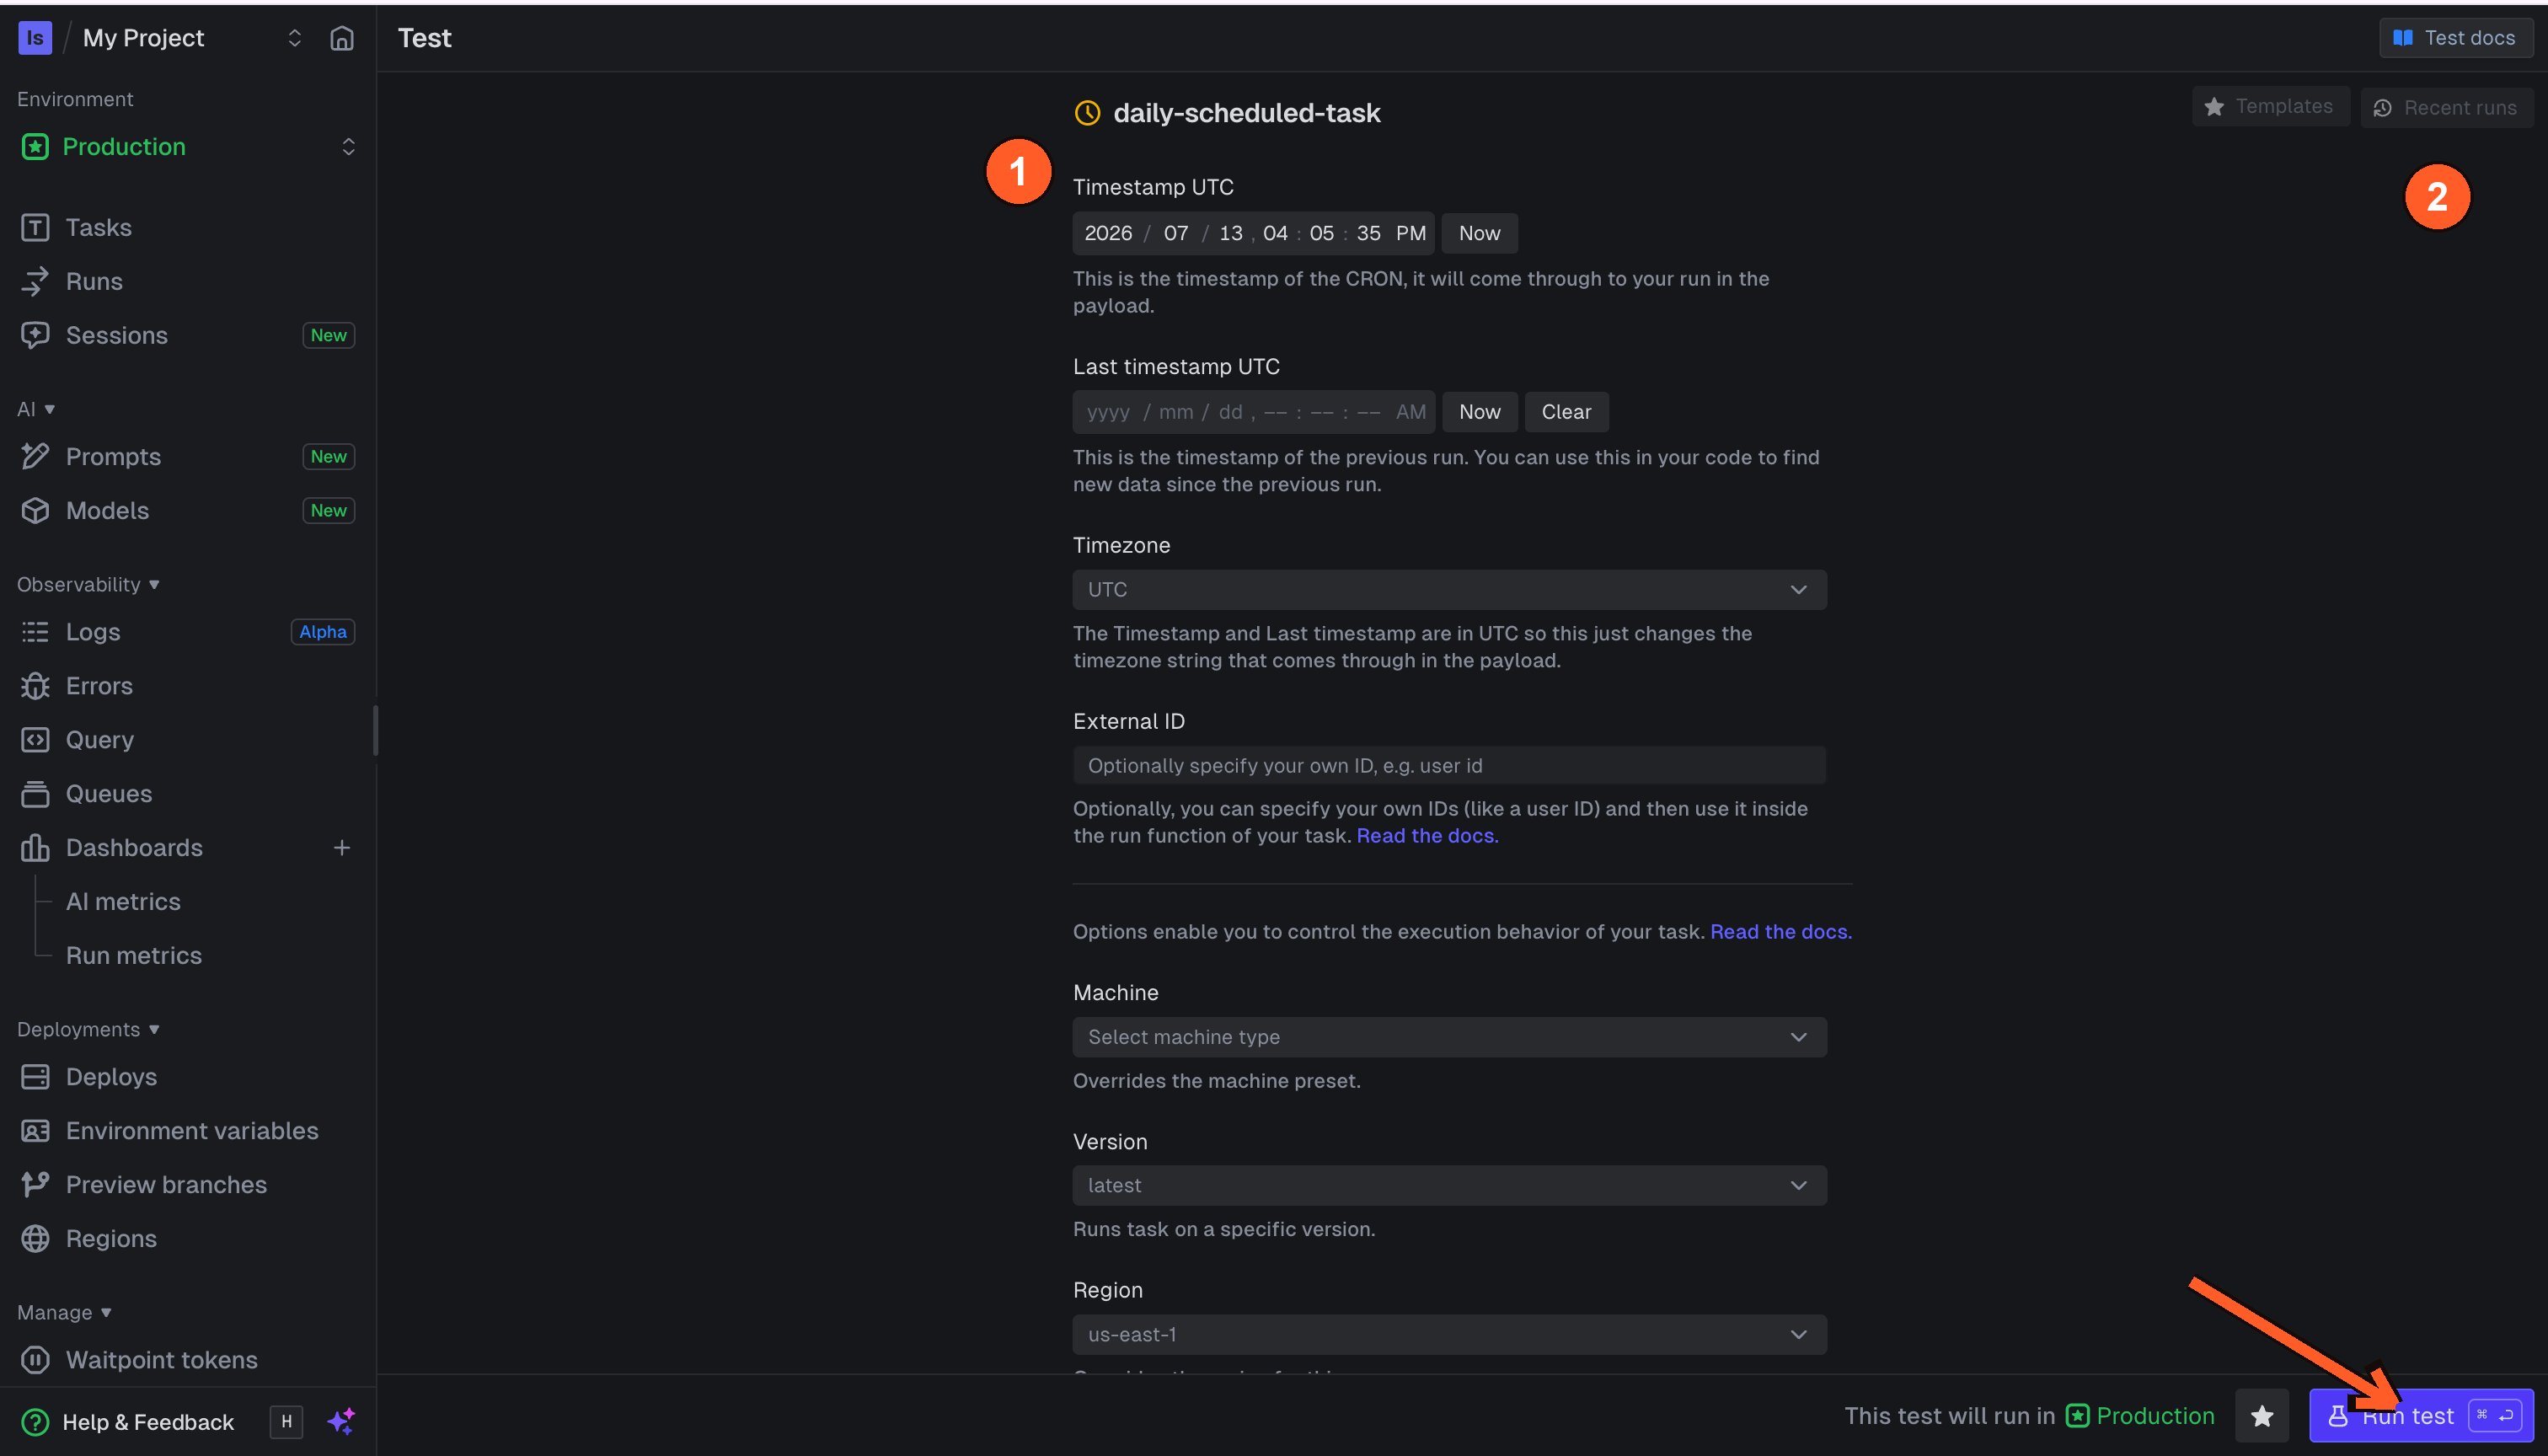
Run the test
Fill in the form [1]. You can select from a recent run [2] to pre-populate the fields. Press “Run
test” when you’re ready