Deploying 101
Let’s assume you have an existing trigger.dev project with a few tasks that you have been running locally but now want to deploy to the Trigger.dev cloud (or your self-hosted instance). First, let’s make sure you are logged in to the CLI (if you haven’t already):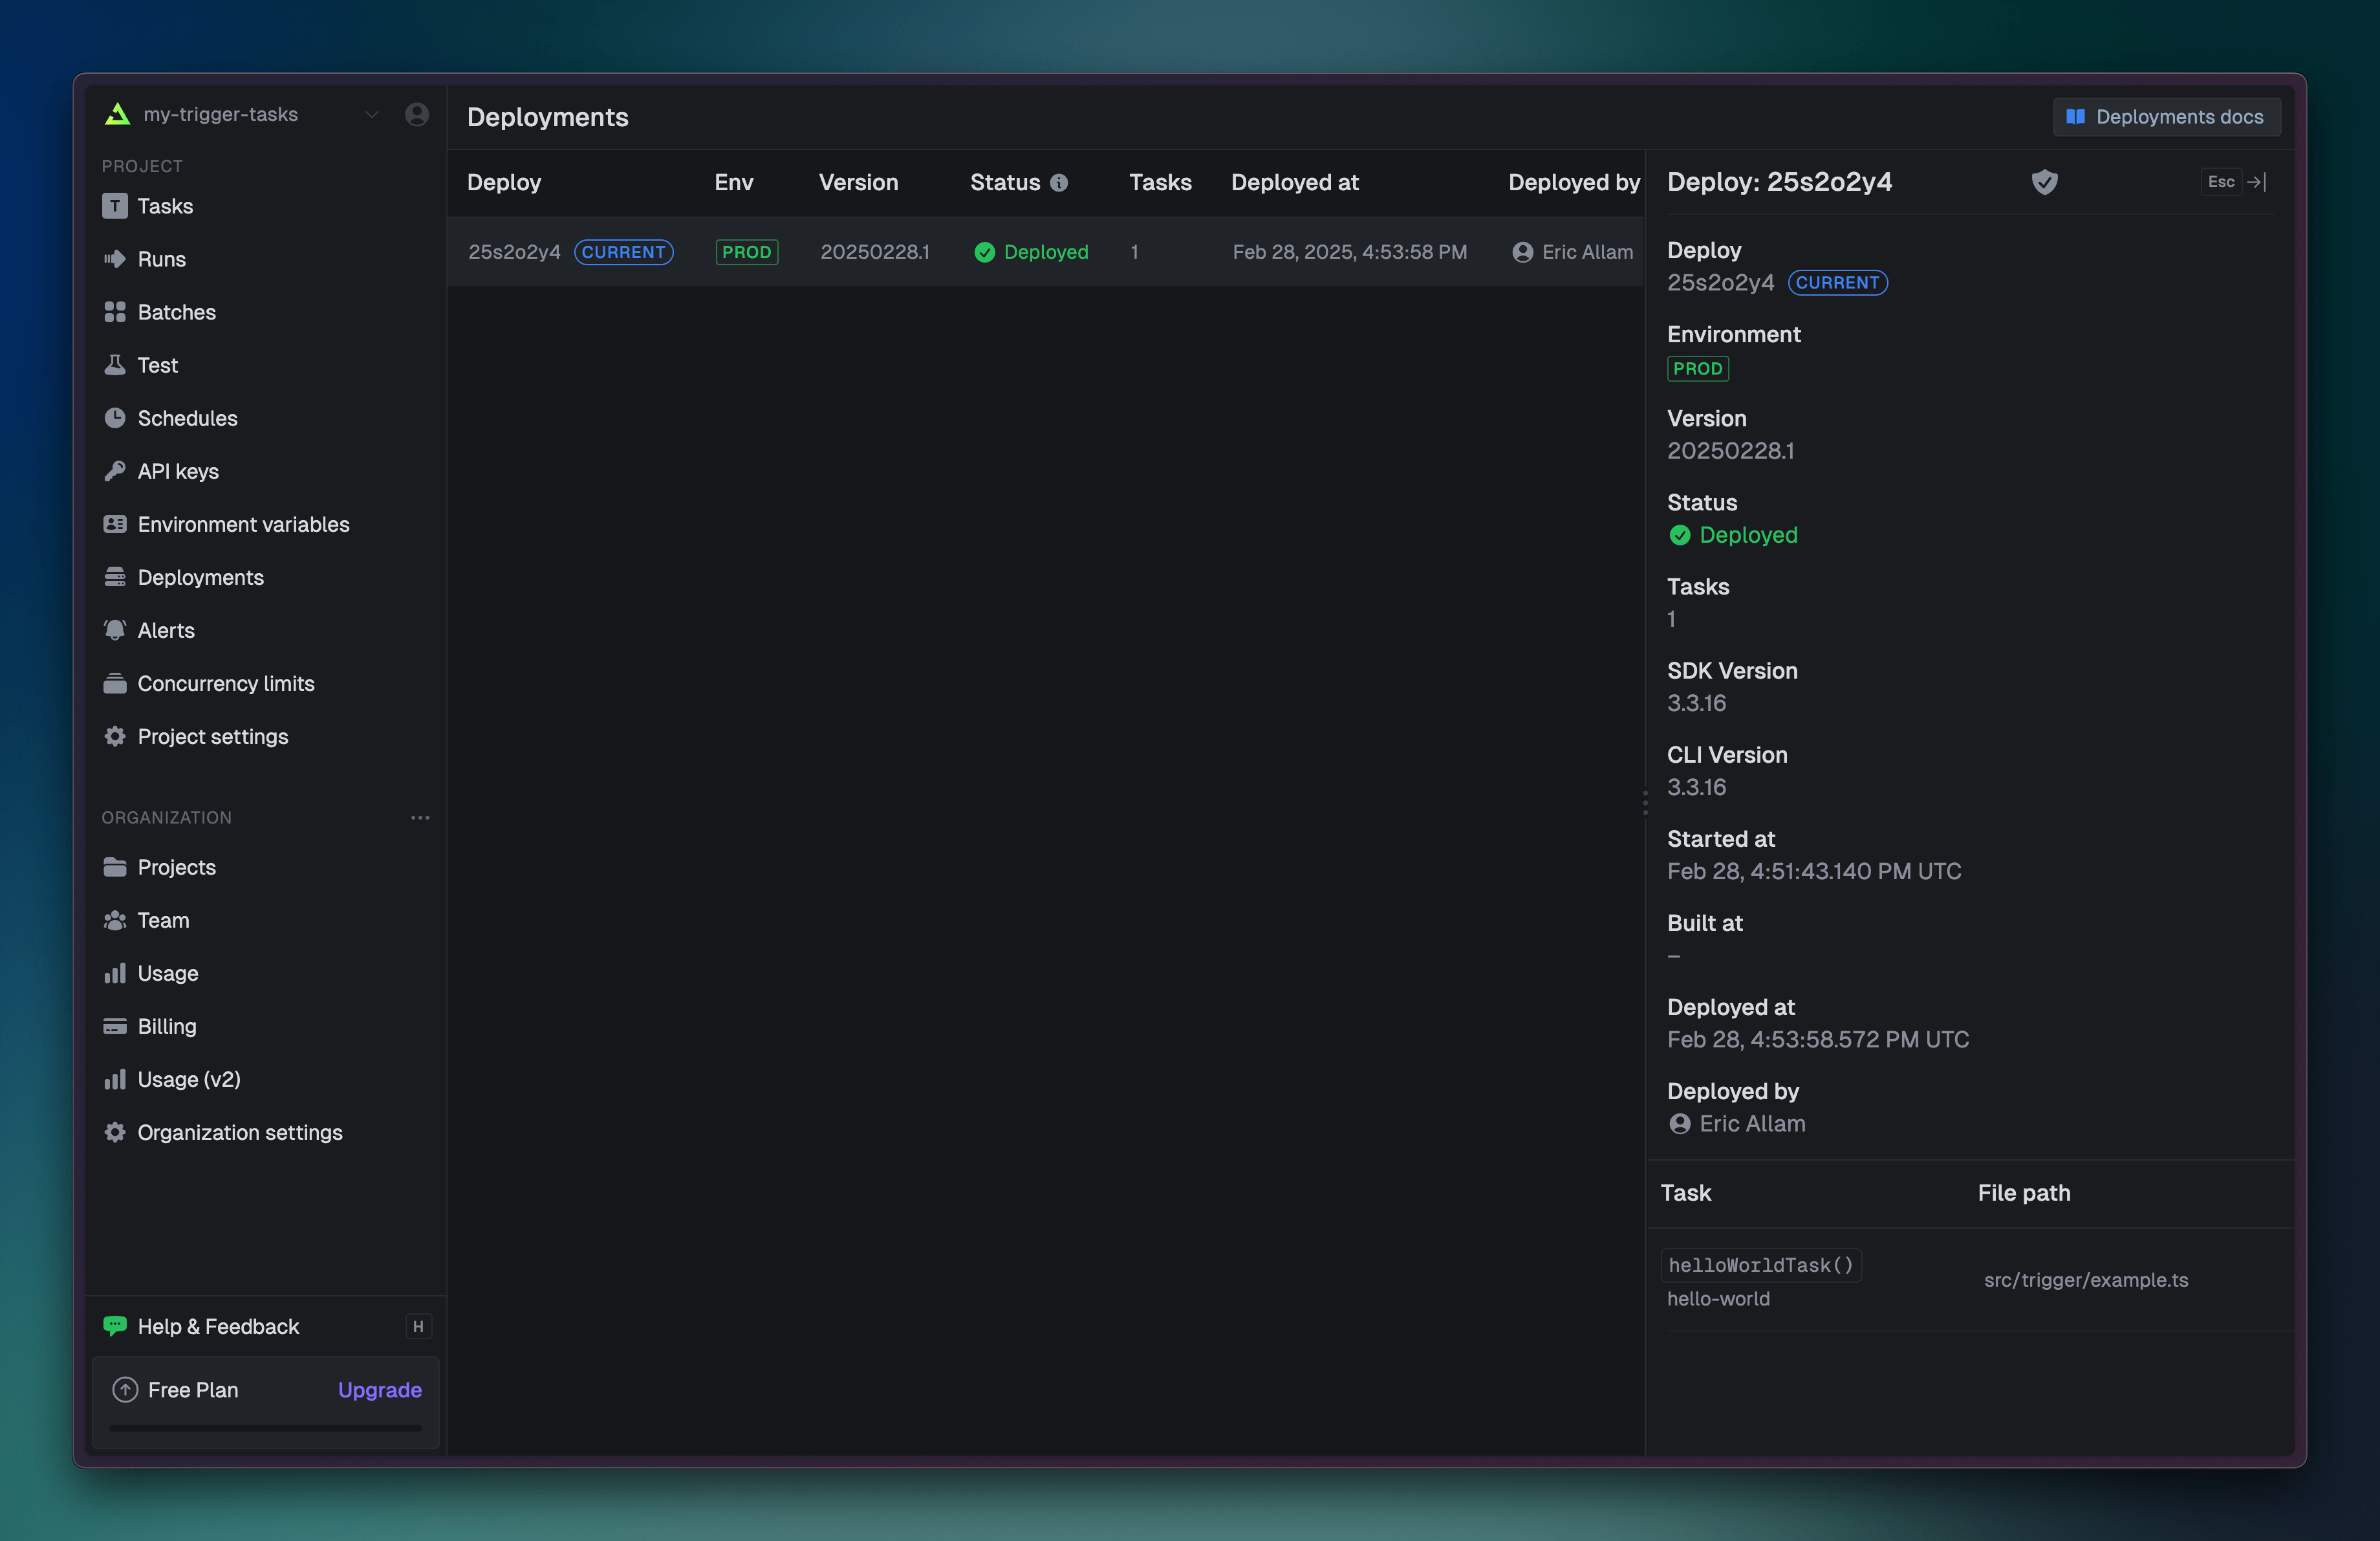
Deploying consists of building your tasks and uploading them to the Trigger.dev cloud. This
process can take a few seconds to a few minutes depending on the size of your project.
Triggering deployed tasks
Once you have deployed your tasks, you can trigger tasks exactly the same way you did locally, but with the “PROD” API key: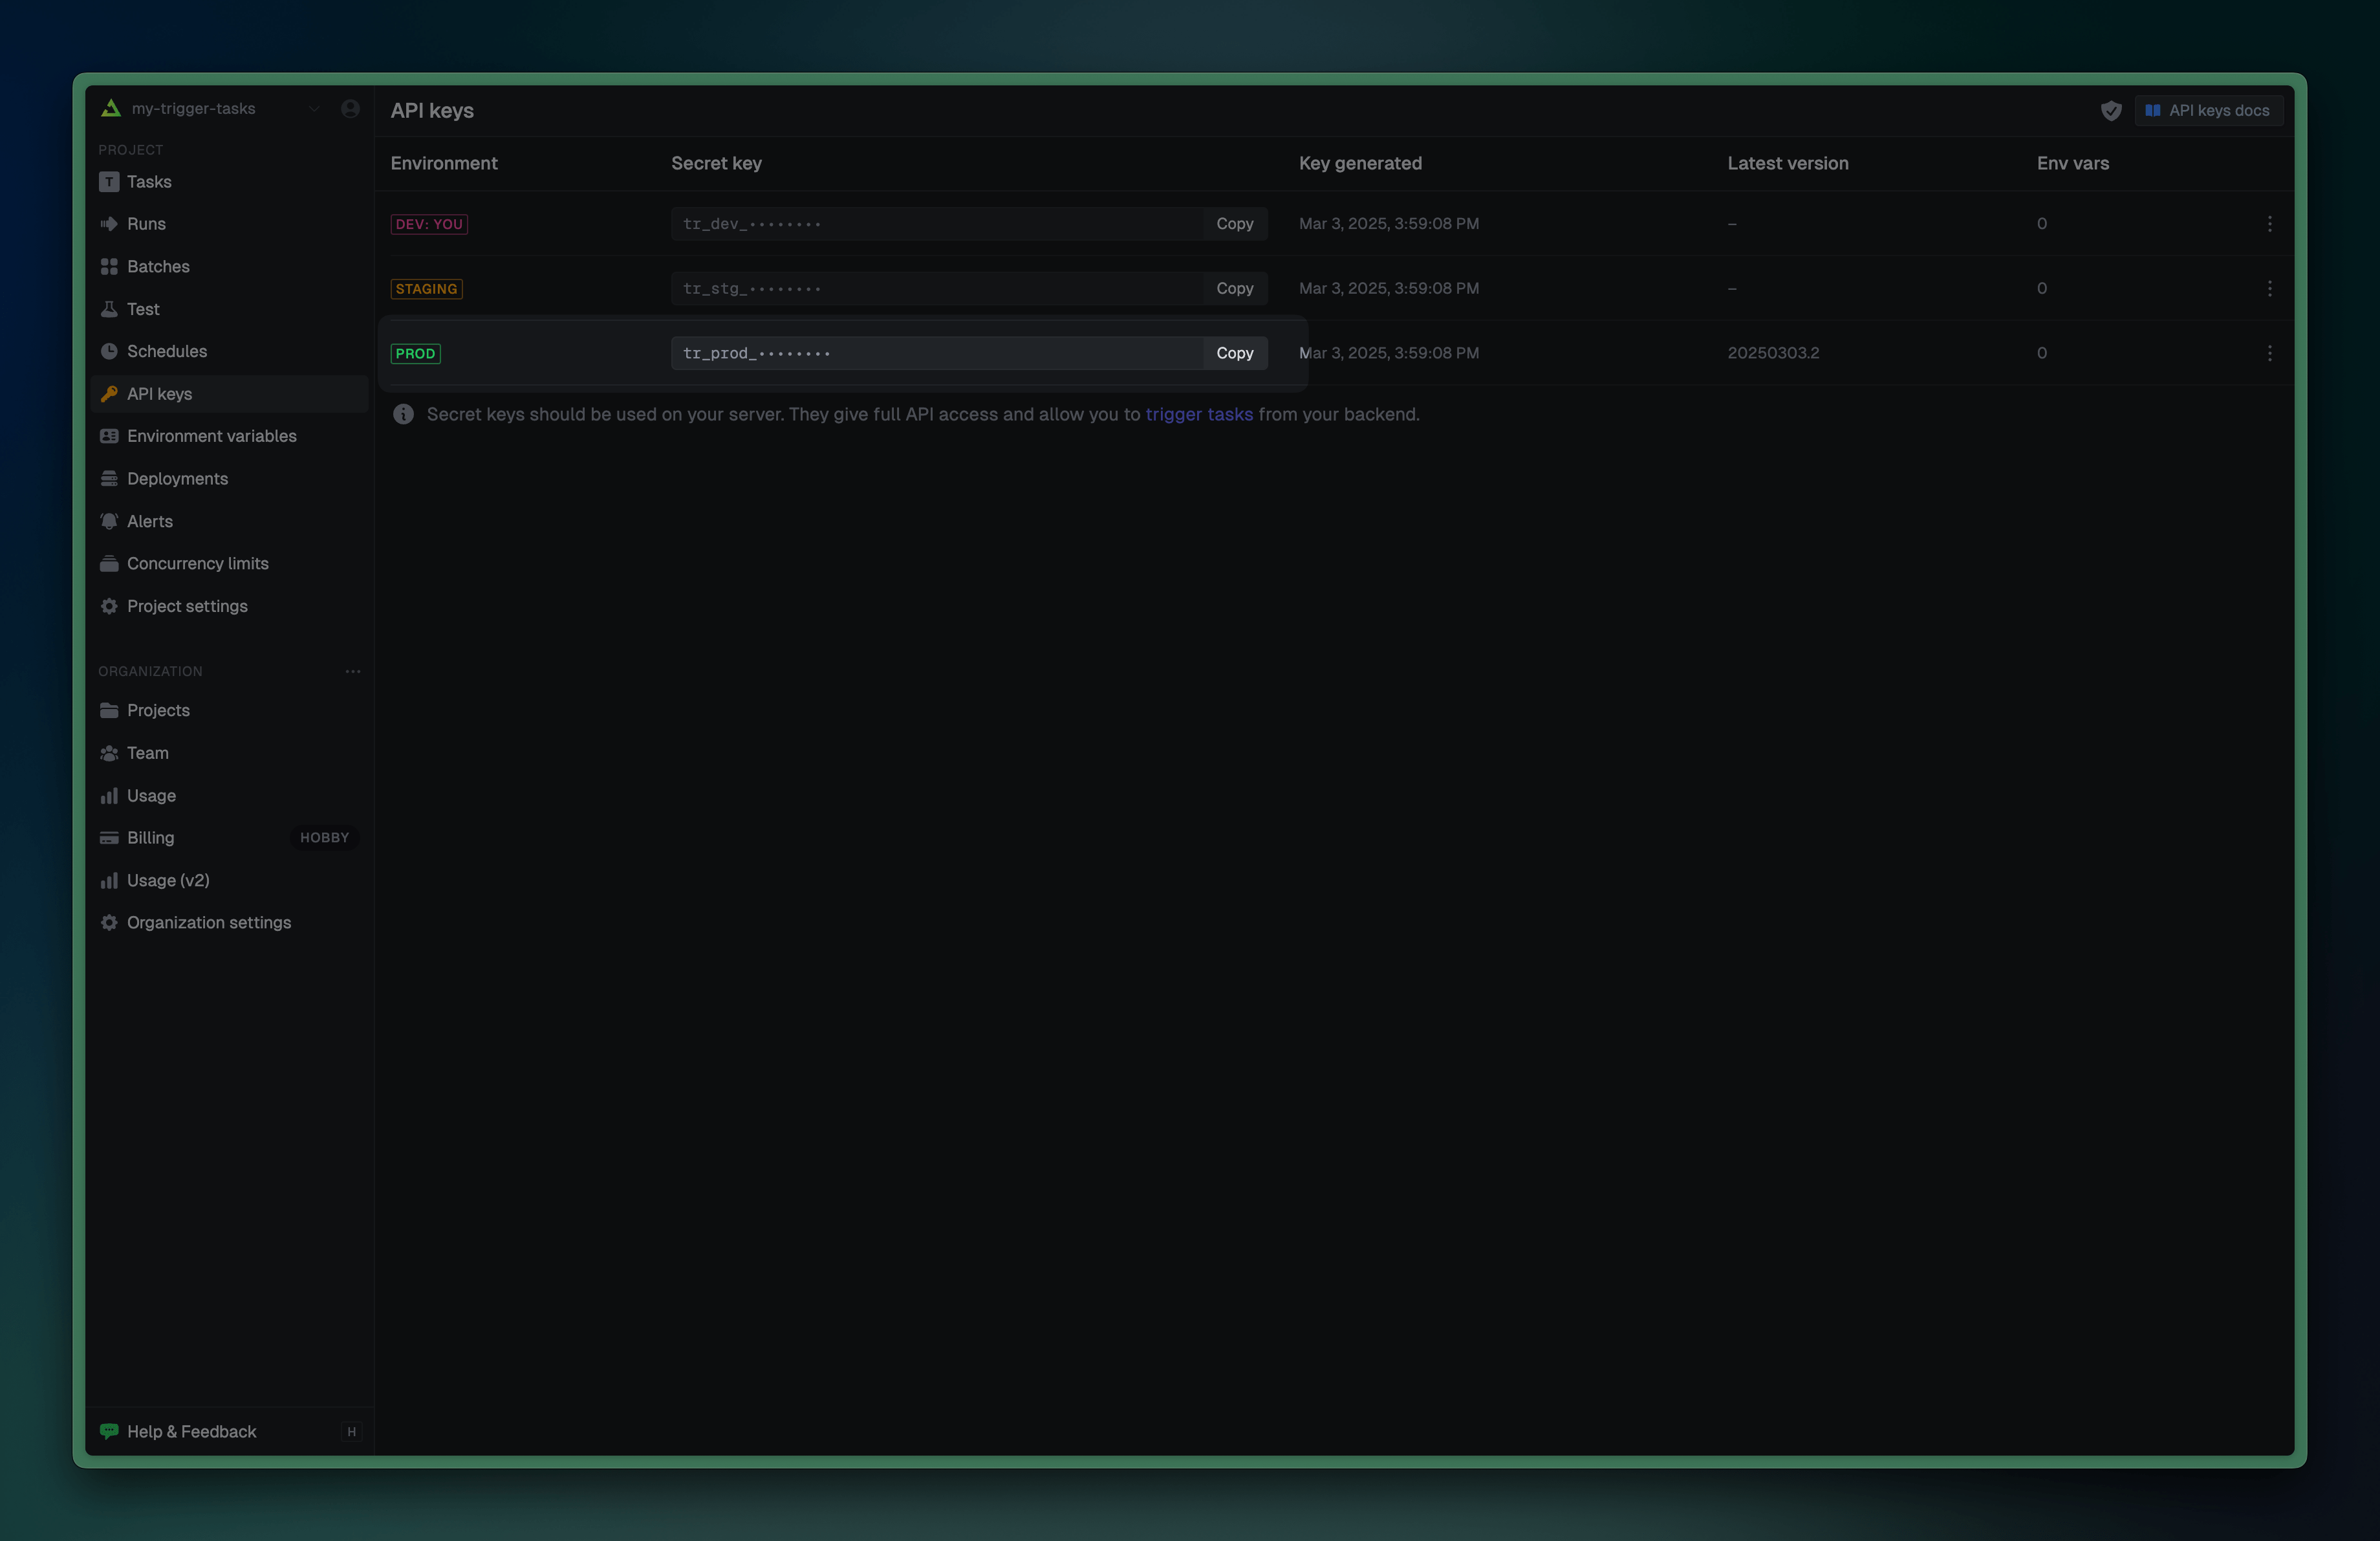
TRIGGER_SECRET_KEY environment variable, and then any tasks you trigger will run against the deployed version:
.env
Versions
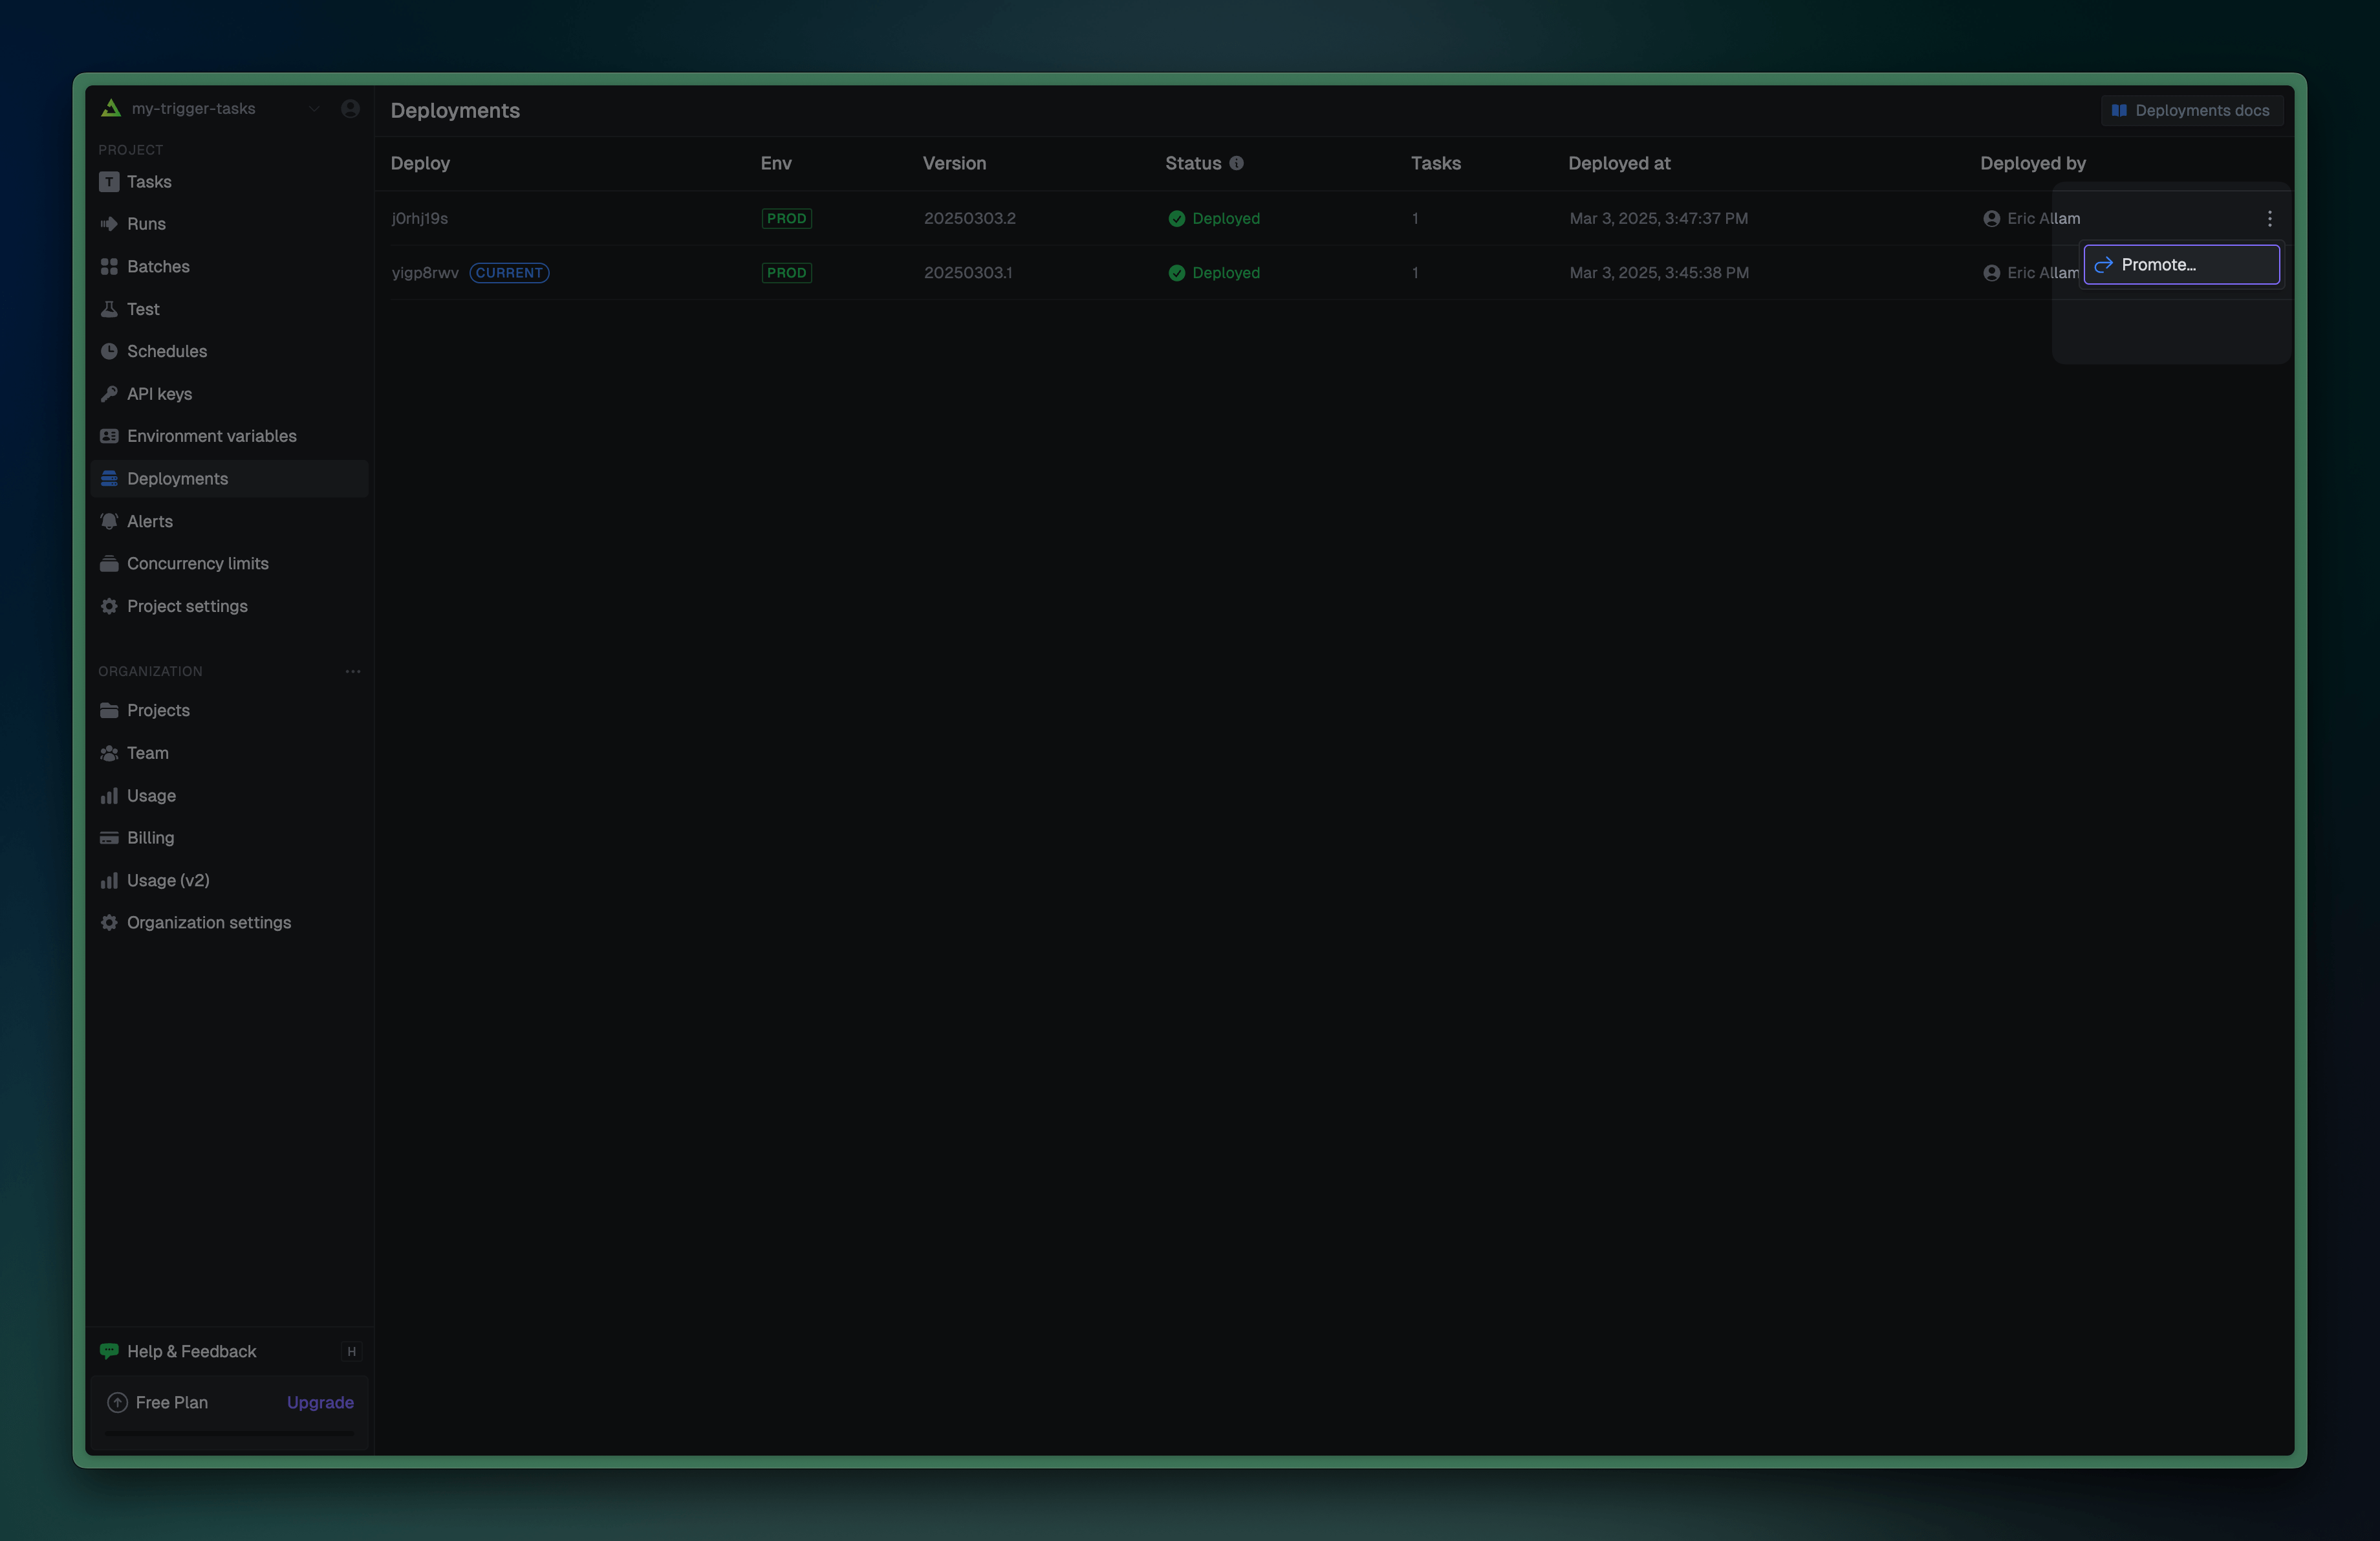
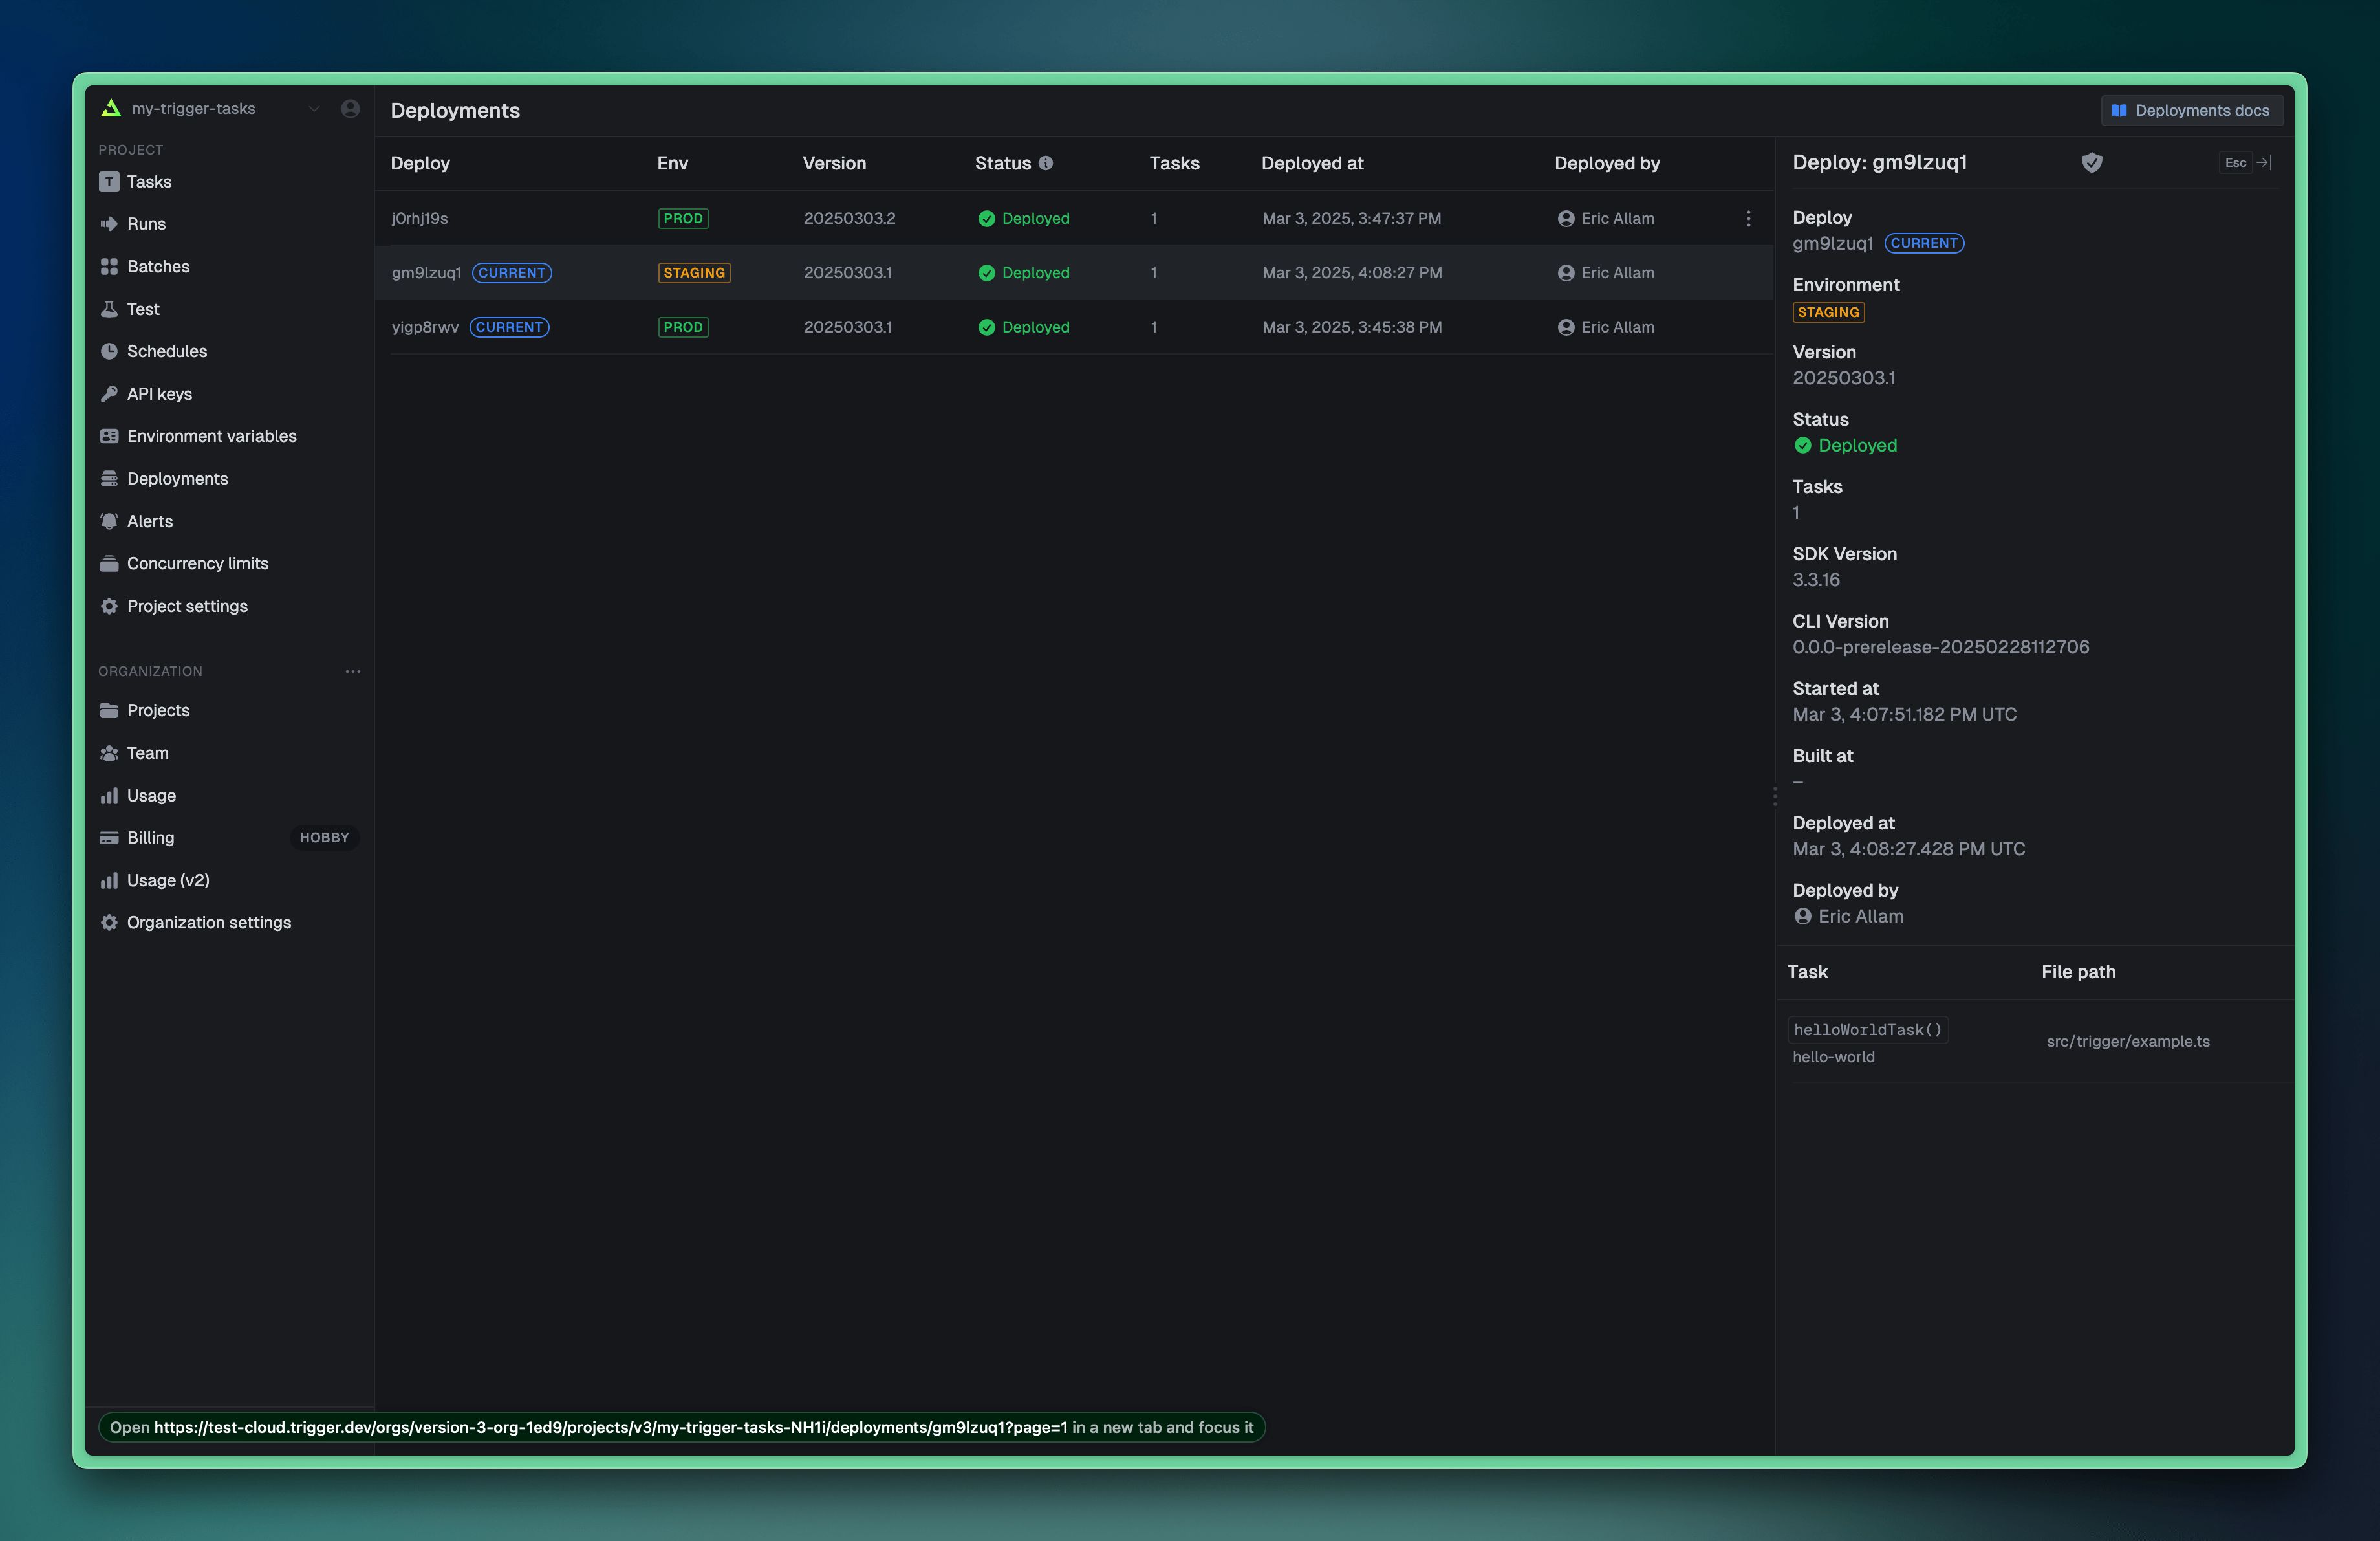
When you deploy your tasks, Trigger.dev creates a new version of all tasks in your project. A version is a snapshot of your tasks at a certain point in time. This ensures that tasks are not affected by changes to the code.Current version
When you deploy, the version number is automatically incremented, and the new version is set as the current version for that environment.A single environment (prod, staging, etc.) can only have a single “current” version at a time.
When you Replay a run in the dashboard we will create a new run, locked to the current version and
not necessarily the version of the original run.
Version locking
You can optionally specify the version when triggering a task using theversion parameter. This is useful when you want to run a task against a specific version of the code:
TRIGGER_VERSION environment variable:
Child tasks and auto-version locking
Trigger and wait functions version lock child task runs to the parent task run version. This ensures the results from child runs match what the parent task is expecting. If you don’t wait then version locking doesn’t apply.Skipping promotion
When you deploy, the new version is automatically promoted be the current version. If you want to skip this promotion, you can use the--skip-promotion flag:

Staging deploys
By default, thedeploy command will deploy to the prod environment. If you want to deploy to a different environment, you can use the --env flag:
If you are using the Trigger.dev Cloud, staging deploys are only available on the Hobby and Pro
plans.
staging environment, with a new version number and an independent current version:
TRIGGER_SECRET_KEY environment variable to the staging API key:
.env
prod and staging, you can use preview branches, which allow you to create isolated environments for each branch of your code.
Local builds
By default we use a remote build provider to speed up builds. However, you can also force the build to happen locally on your machine using the--force-local-build flag:
System requirements
To use local builds, you need the following tools installed on your machine:- Docker (installation guide)
- Docker Buildx (installation guide)
Environment variables
To add custom environment variables to your deployed tasks, you need to add them to your project in the Trigger.dev dashboard, or automatically sync them using our syncEnvVars or syncVercelEnvVars build extensions. For more information on environment variables, see our environment variables guide.Troubleshooting
When things go wrong with your deployment, there are a few things you can do to diagnose the issue:Dry runs
You can do a “dry run” of the deployment to see what is built and uploaded without actually deploying:Debug logs
You can run the deploy command with--log-level debug at the end. This will print out a lot of information about the deploy. If you can’t figure out the problem from the information below please join our Discord and create a help forum post. Do NOT share the extended debug logs publicly as they might reveal private information about your project.
Common issues
Failed to build project image: Error building image
There should be a link below the error message to the full build logs on your machine. Take a look at these to see what went wrong. Join our Discord and you share it privately with us if you can’t figure out what’s going wrong. Do NOT share these publicly as the verbose logs might reveal private information about your project.
Sometimes these errors are caused by upstream availability issues with our remote build provider. In this case, you can try deploying with a local build using the --force-local-build flag. Refer to the Local builds section for more information.
Deployment encountered an error
Usually there will be some useful guidance below this message. If you can’t figure out what’s going wrong then join our Discord and create a Help forum post with a link to your deployment.
No loader is configured for ".node" files
This happens because .node files are native code and can’t be bundled like other packages. To fix this, add your package to build.external in the trigger.config.ts file like this:
trigger.config.ts
Cannot find matching keyid
This error occurs when using Node.js v22 with corepack, as it’s not yet compatible with the latest package manager signatures. To fix this, either:
- Downgrade to Node.js v20 (LTS), or
- Install corepack globally:
npm i -g corepack@latest