How it works
Atomic deploys achieve synchronization by deploying your tasks to Trigger.dev without promoting them to the default version. Instead, you explicitly specify the deployed task version in your application’s environment. Here’s the process at a glance:- Deploy Tasks to Trigger.dev: Use the Trigger.dev CLI to deploy your tasks with the
--skip-promotionflag. This creates a new task version without making it the default. - Capture the Deployment Version: The CLI outputs the version of the deployed tasks, which you’ll use in the next step.
- Deploy Your Application: Deploy your application (e.g., to Vercel), setting an environment variable like
TRIGGER_VERSIONto the captured task version.
Vercel CLI & GitHub Actions
If you deploy to Vercel via their CLI, you can use this sample workflow that demonstrates performing atomic deploys with GitHub Actions, Trigger.dev, and Vercel:-
Deploy to Trigger.dev
- The
npx trigger.dev deploycommand uses--skip-promotionto deploy the tasks without setting the version as the default. - The step’s id:
deploy-triggerallows us to capture the deployment version in the output (deploymentVersion).
- The
-
Deploy to Vercel:
- The
npx vercelcommand deploys the application, setting theTRIGGER_VERSIONenvironment variable to the task version from the previous step. - The —prod flag ensures a production deployment, and -e passes the environment variable.
- The
@trigger.dev/sdkautomatically uses theTRIGGER_VERSIONenvironment variable to trigger the correct version of the tasks.
- The
TRIGGER_ACCESS_TOKEN: Your Trigger.dev personal access token. View the instructions here to learn more.VERCEL_TOKEN: Your Vercel personal access token. You can find this in your Vercel account settings.
Vercel GitHub integration
If you’re are using Vercel, chances are you are using their GitHub integration and deploying your application directly from pushes to GitHub. This section covers how to achieve atomic deploys with Trigger.dev in this setup.Turn off automatic promotion
By default, Vercel automatically promotes new deployments to production. To prevent this, you need to disable the auto-promotion feature in your Vercel project settings:- Go to your Production environment settings in Vercel at
https://vercel.com/<team-slug>/<project-slug>/settings/environments/production - Disable the “Auto-assign Custom Production Domains” setting:
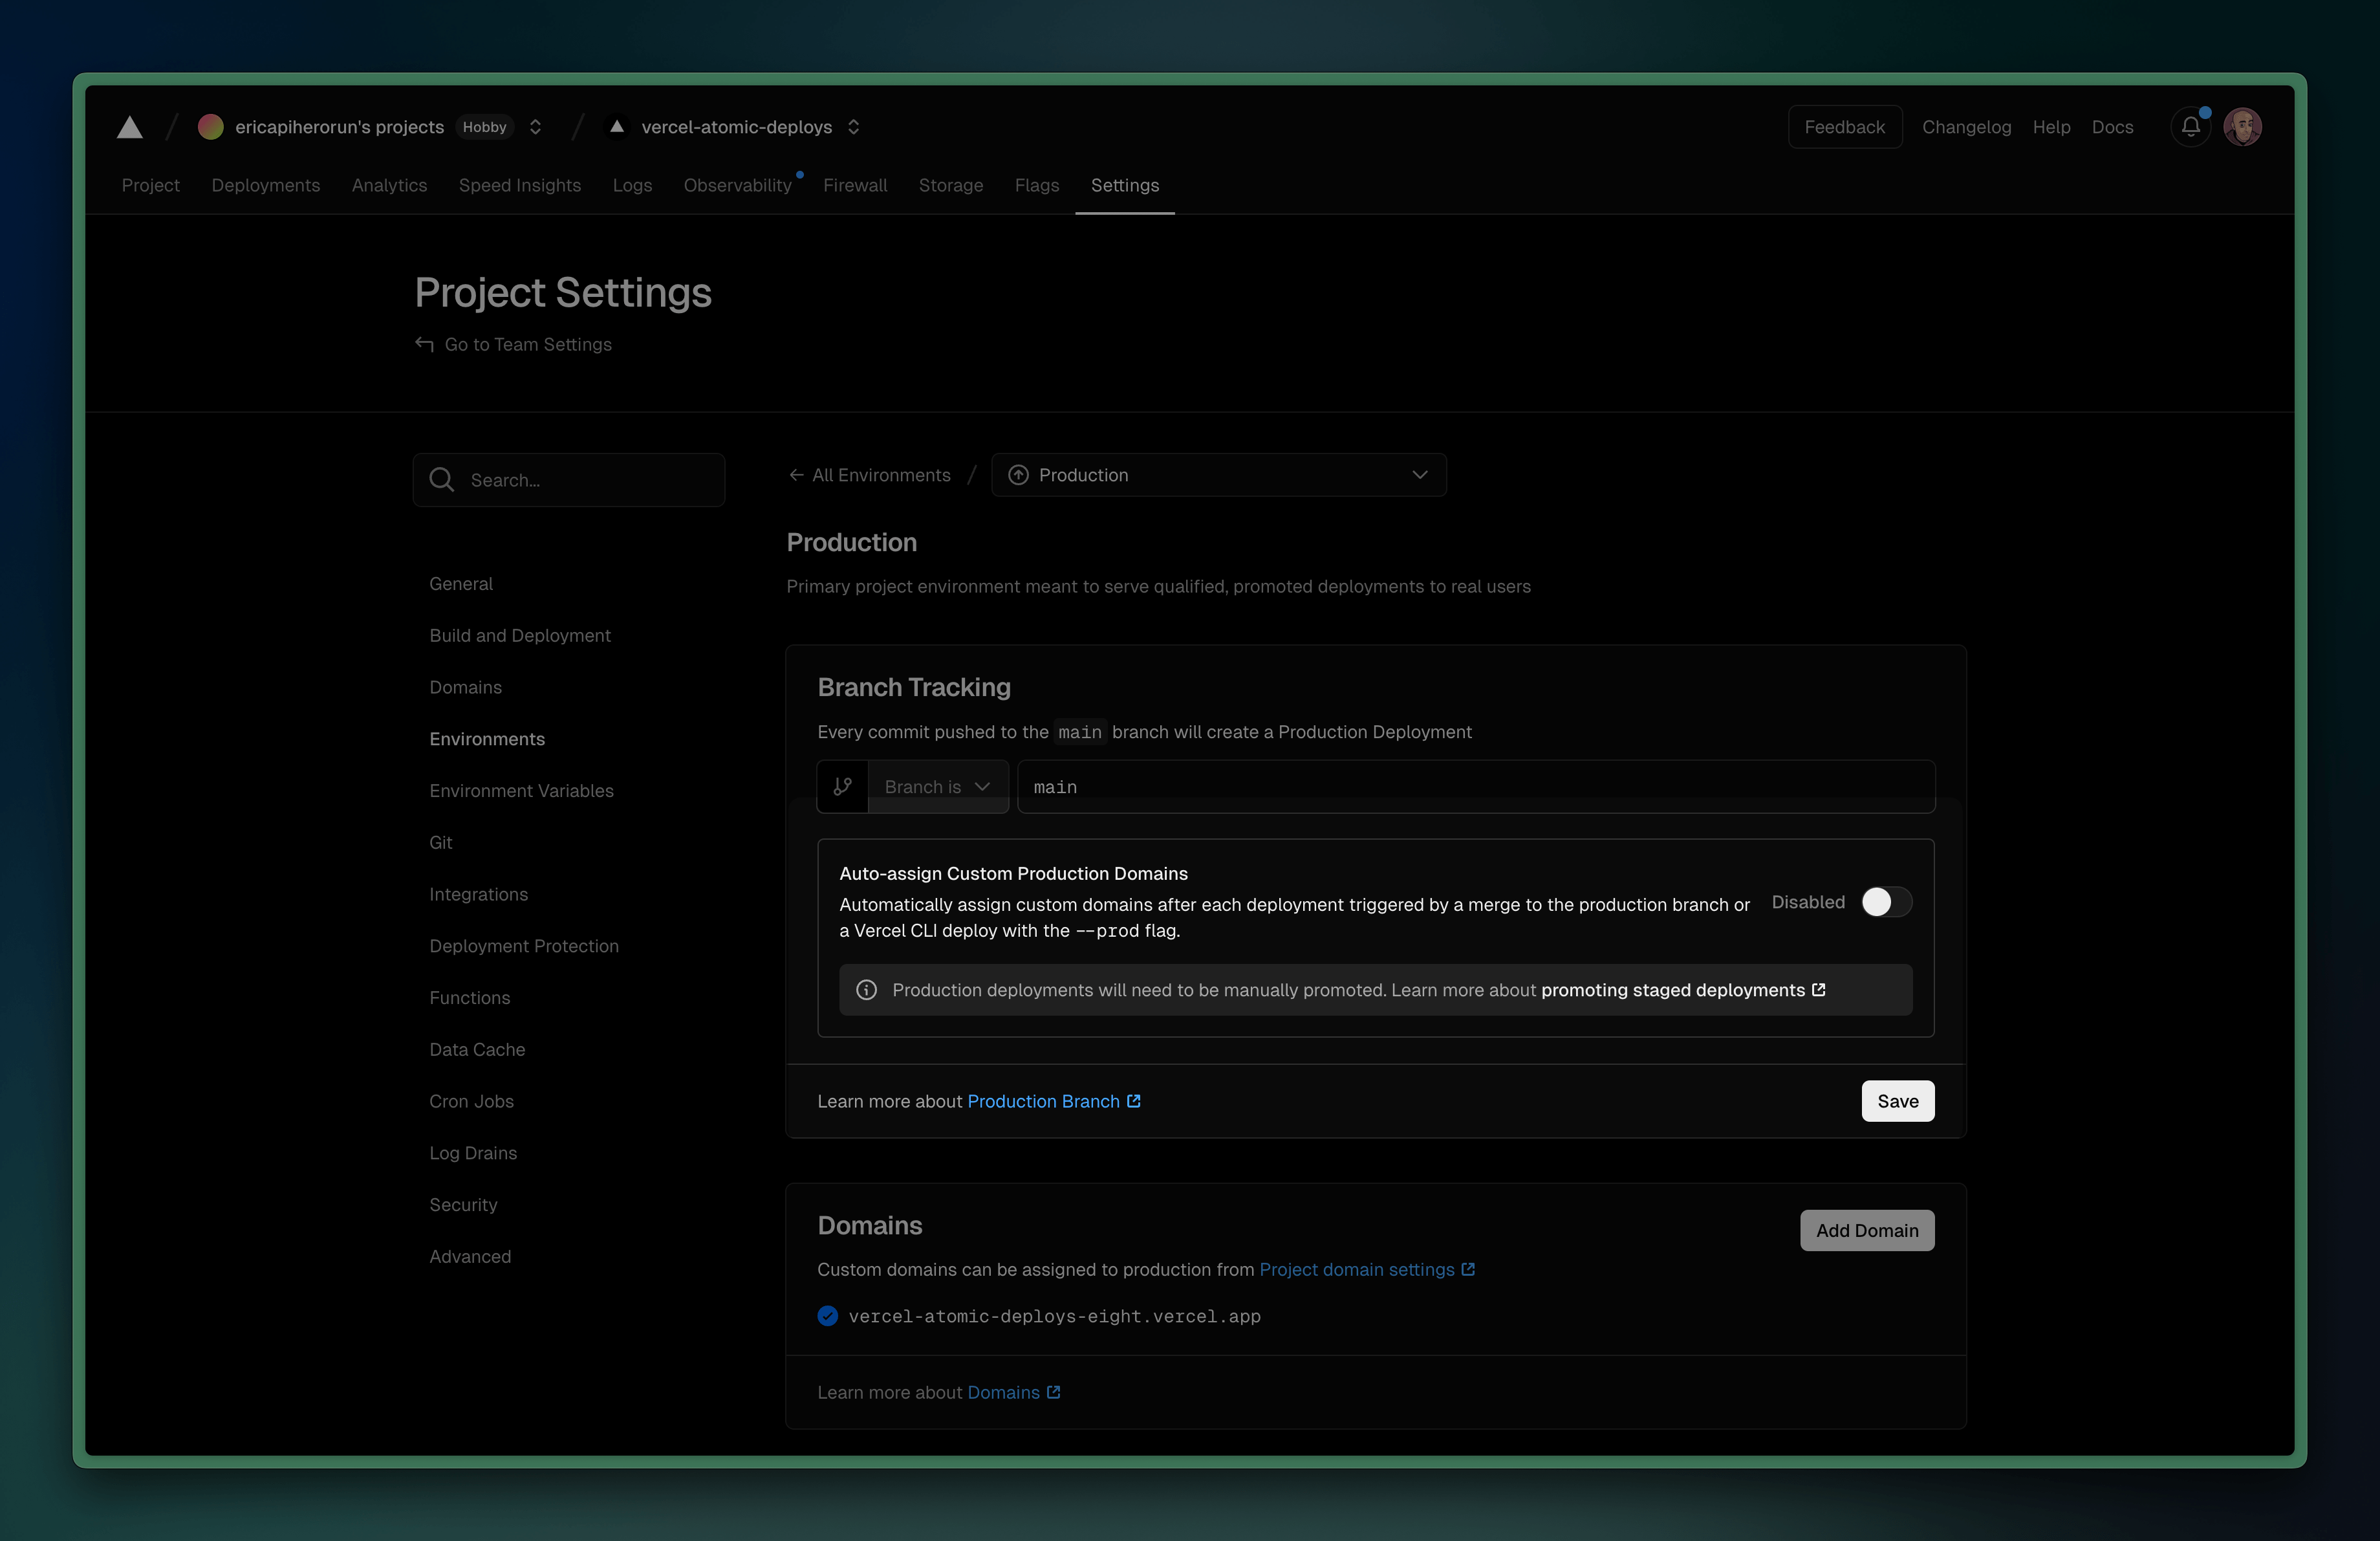
- Hit the “Save” button to apply the changes.
Deploy with Trigger.dev
Now we want to deploy that same commit to Trigger.dev, and then promote the Vercel deployment when that completes. Here’s a sample GitHub Actions workflow that does this:- Waits for the Vercel deployment to complete using the
ludalex/vercel-waitaction. - Deploys the tasks to Trigger.dev using the
npx trigger.dev deploycommand. There’s no need to use the--skip-promotionflag because we want to promote the deployment. - Promotes the Vercel deployment using the
npx vercel promotecommand.
TRIGGER_ACCESS_TOKEN: Your Trigger.dev personal access token. View the instructions here to learn more.VERCEL_TOKEN: Your Vercel personal access token. You can find this in your Vercel account settings.VERCEL_PROJECT_ID: Your Vercel project ID. You can find this in your Vercel project settings.VERCEL_SCOPE_NAME: Your Vercel team slug.
We are using the
ludalex/vercel-wait action above as a fork of the official
tj-actions/vercel-wait action because there is a bug
in the official action that exits early if the deployment isn’t found in the first check and due
to the fact that it supports treating skipped (cancelled) Vercel deployments as valid (on by default).
I’ve opened a PR for this issue here.