How it works
Once you connect a GitHub repository to your project, you can configure tracking branches for the production and staging environments. Every push to a tracked branch creates a deployment in the corresponding environment. Preview branch deployments are also supported for pull requests. This eliminates the need to manually run thetrigger.dev deploy command or set up custom CI/CD workflows.
Setup
1
Install our GitHub app
Go to your project’s settings page and click
Install GitHub app.
This will take you to GitHub to authorize the Trigger.dev app for your organization or personal account.2
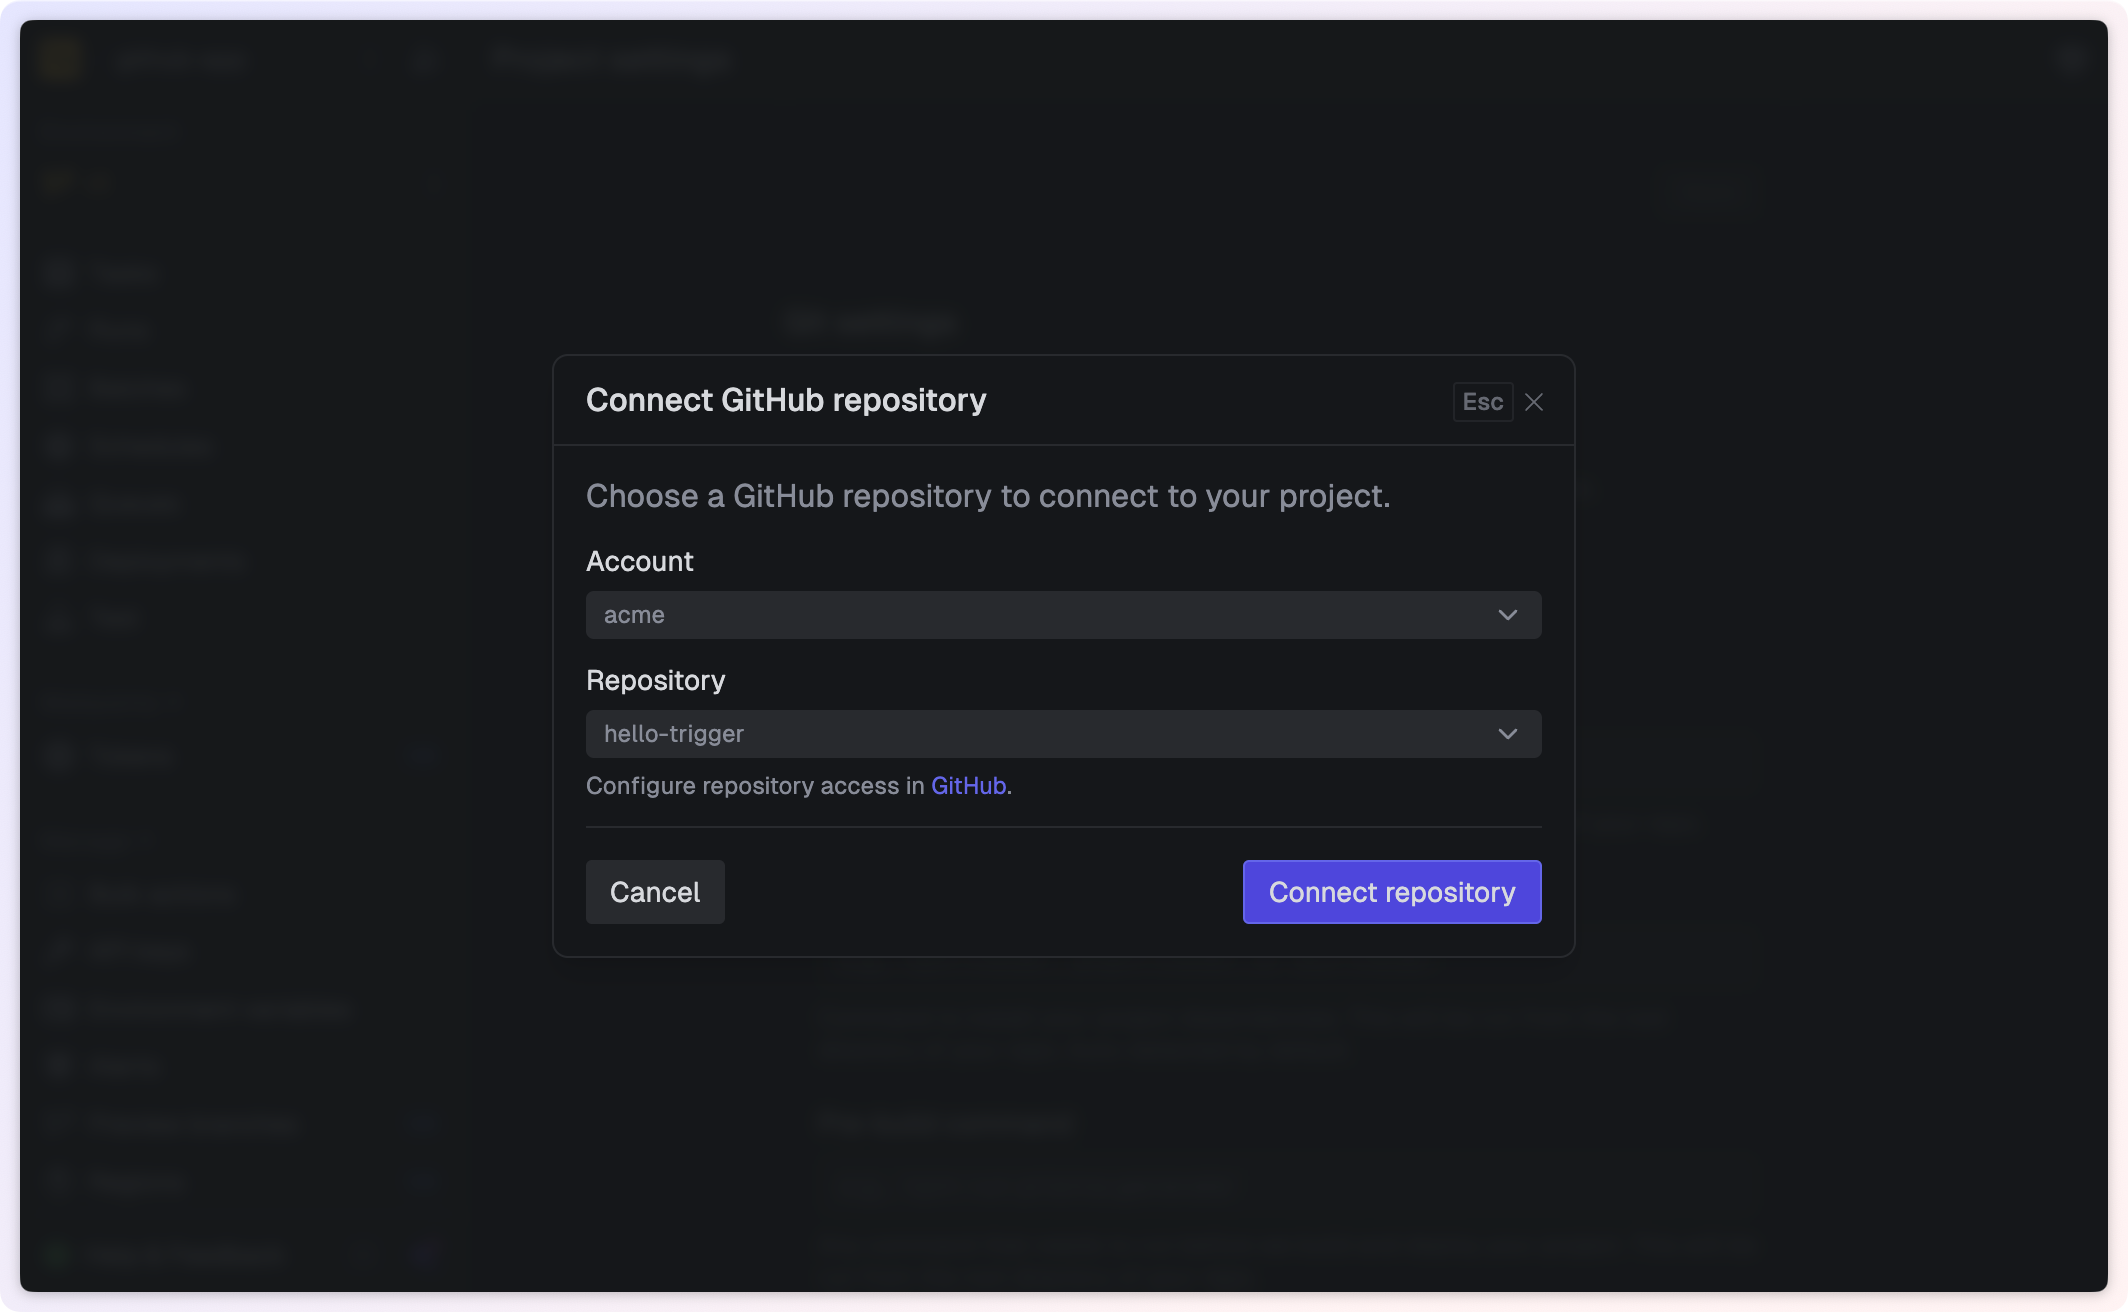
Connect your repository
Select a repository to connect to your project.
3
Configure branch tracking
Choose which branches should trigger automatic deployments:
- Production: The branch that deploys to your production environment, e.g.,
main. - Staging: The branch that deploys to your staging environment.
- Preview: Toggle to enable preview deployments for pull requests
4
Customize build settings (optional)
Configure how your project is built:
- Trigger config file: Path to your
trigger.config.tsfile. By default, we look for it in the root of your repository. The path should be relative to the root of your repository and contain the config file name, e.g.,apps/tasks/trigger.config.ts. - Install command: Auto-detected by default, but you can override it if necessary. The command will be run from the root of your repository.
- Pre-build command: Run any commands before building and deploying your project, e.g.,
pnpm run prisma:generate. The command will be run from the root of your repository.
Branch tracking
Our GitHub integration uses branch tracking to determine when and where to deploy your code.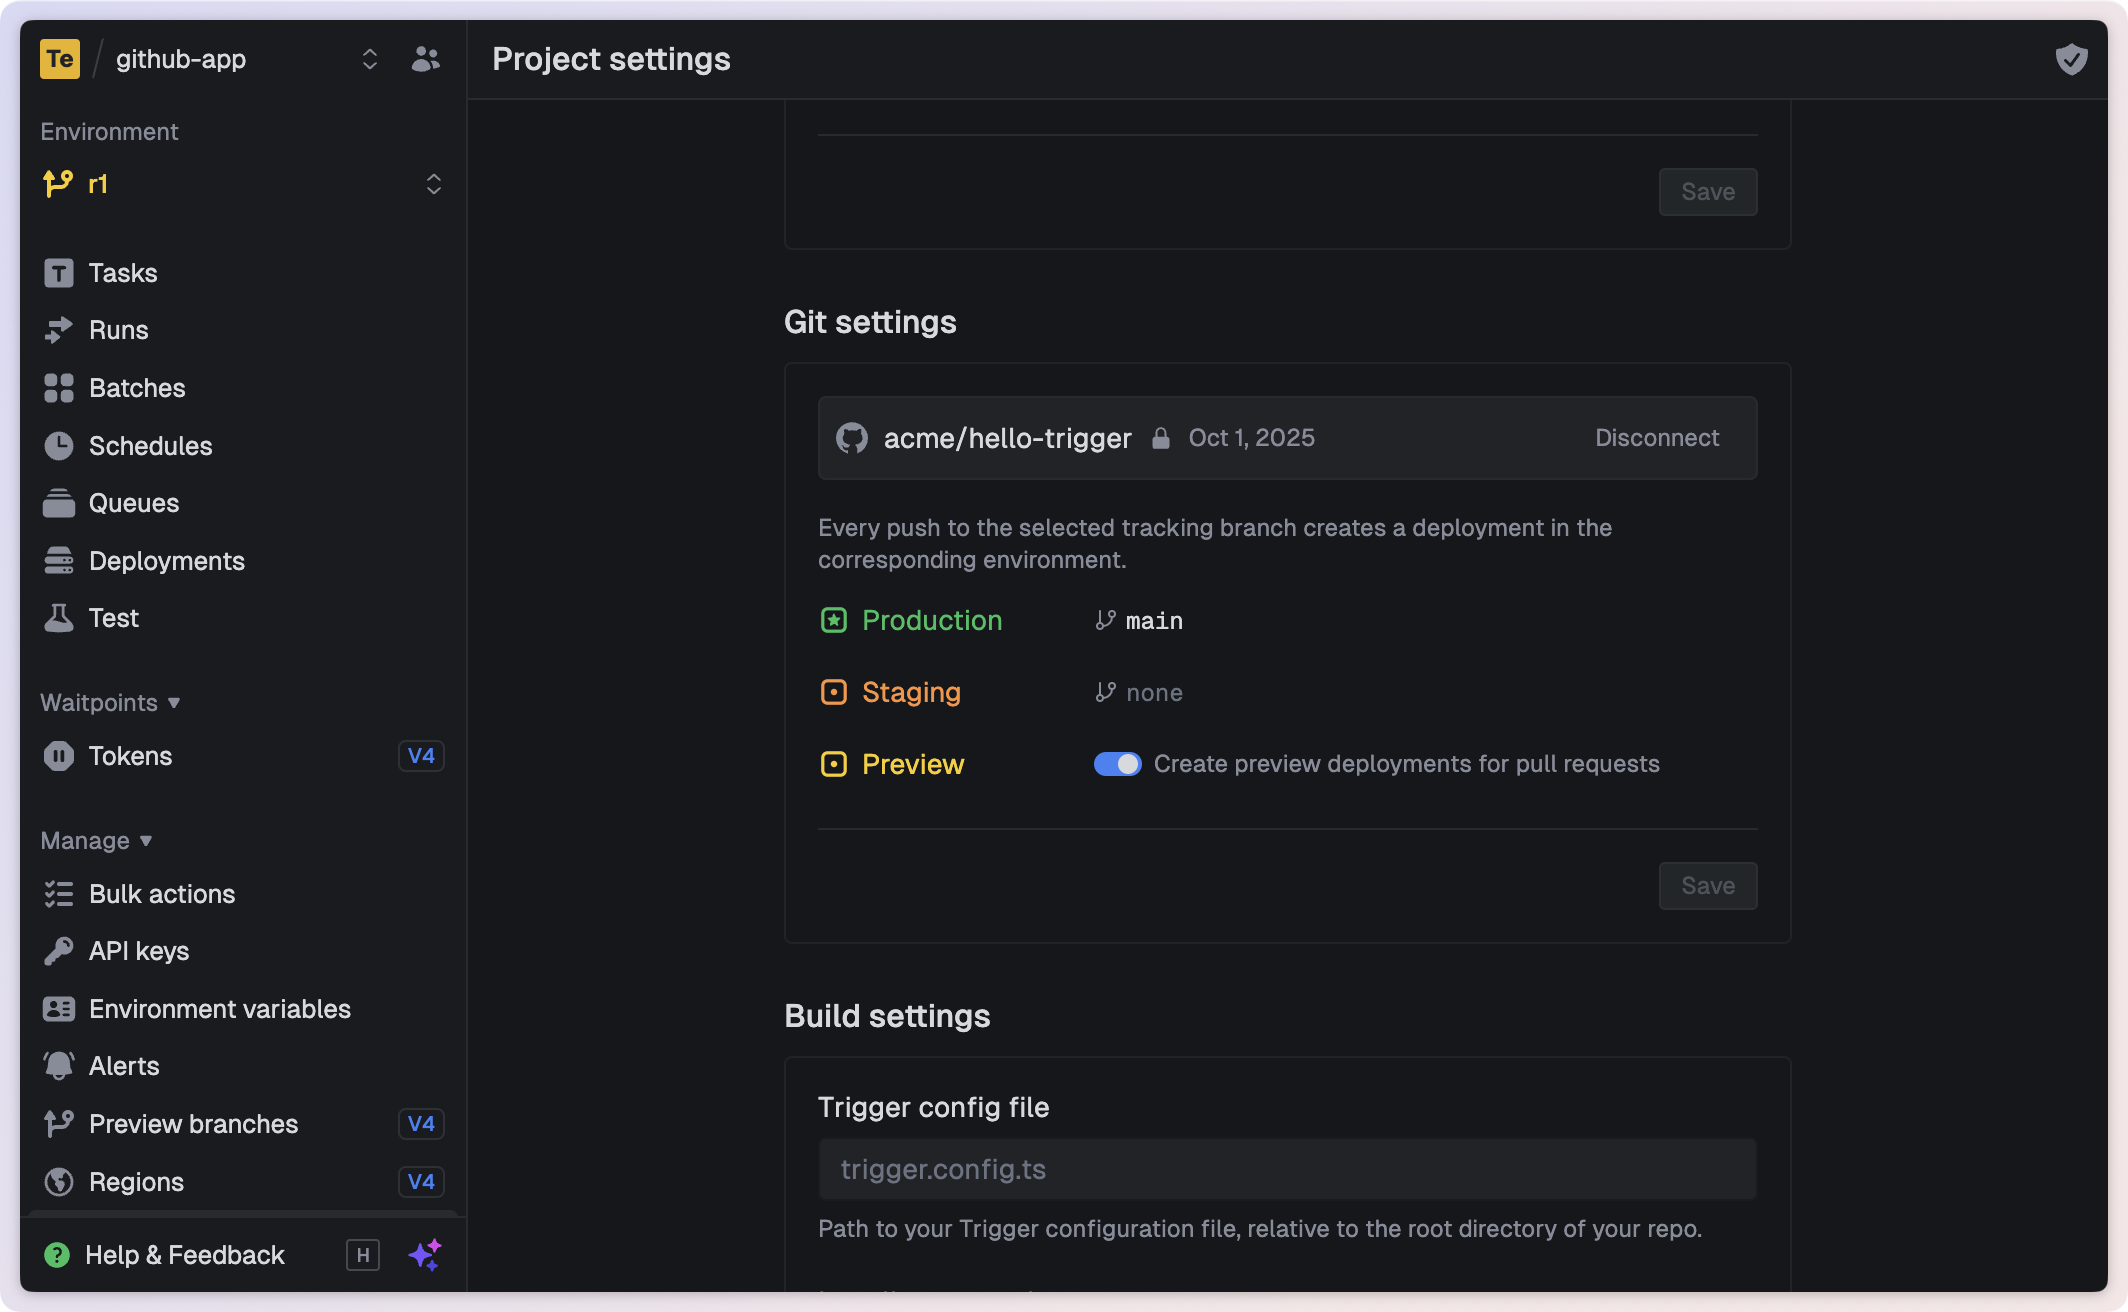
Production and staging branches
When you connect a repository, the default branch of your repository will be used as the production tracking branch, by default. When you configure a production or staging branch, every push to that branch will trigger a deployment. Our build server will install the project dependencies, build your project, and deploy it to the corresponding environment. If there are multiple consecutive pushes to a tracked branch, the later deployments will be queued until the previous deployment completes.When you connect a repository, the default branch of your repository will be used as the production tracking branch by default.
You can change this in the git settings of your project.
Pull requests
By default, pull requests will be deployed to preview branch environments, enabling you to test changes before merging. When the pull request is merged or closed, the preview branch is automatically archived. The name of the preview branch matches the branch name of the pull request.Preview branch deployments require the preview environment to be enabled on your project. Learn more about preview branches.
Disconnecting a repository
You can disconnect a repository at any time from your project git settings. This will stop automatic deployments triggered from GitHub.Managing repository access
To add or remove repository access for the Trigger.dev GitHub app, follow the link in theConnect GitHub repository modal:
- Go to your GitHub account settings
- Navigate to Settings → Applications → Installed GitHub Apps
- Click Configure next to
Trigger.dev App - Update repository access under
Repository access
Environment variables at build time
You can expose environment variables during the build and deployment process by prefixing them withTRIGGER_BUILD_.
In the build server, the TRIGGER_BUILD_ prefix is stripped from the variable name, i.e., TRIGGER_BUILD_MY_TOKEN is exposed as MY_TOKEN.
Build extensions will also have access to these variables.
Build environment variables only apply to deployments in the environment you set them in.
Using a private npm registry
If your project uses packages from a private npm registry, you can provide authentication by setting aTRIGGER_BUILD_NPM_RC environment variable.
The value should be the contents of your .npmrc file including any token credentials, encoded to base64.
Example
Example.npmrc file containing credentials for a private npm registry and a GitHub package registry:
TRIGGER_BUILD_NPM_RC environment variable in your project settings with the encoded value.
The build server will automatically create a
.npmrc file in the installation directory based on the content of the TRIGGER_BUILD_NPM_RC environment variable.
This enables the build server to authenticate to your private npm registry.