The trigger.config.ts file is used to configure your Trigger.dev project. It is a TypeScript file at the root of your project that exports a default configuration object. Here’s an example:
import { defineConfig } from "@trigger.dev/sdk";

export default defineConfig({
  // Your project ref (you can see it on the Project settings page in the dashboard)
  project: "<project ref>",
  //The paths for your trigger folders
  dirs: ["./trigger"],
  retries: {
    //If you want to retry a task in dev mode (when using the CLI)
    enabledInDev: false,
    //the default retry settings. Used if you don't specify on a task.
    default: {
      maxAttempts: 3,
      minTimeoutInMs: 1000,
      maxTimeoutInMs: 10000,
      factor: 2,
      randomize: true,
    },
  },
});
- Specifying where your trigger tasks are located using the
dirs option.
- Setting the default retry settings.
- Configuring OpenTelemetry instrumentations.
- Customizing the build process.
- Adding global task lifecycle functions.
The config file is bundled with your project, so code imported in the config file is also bundled,
which can have an effect on build times and cold start duration. One important qualification is
anything defined in the build config is automatically stripped out of the config file, and
imports used inside build config with be tree-shaken out.
Dirs
You can specify the directories where your tasks are located using the dirs option:
import { defineConfig } from "@trigger.dev/sdk";

export default defineConfig({
  project: "<project ref>",
  dirs: ["./trigger"],
});
dirs option, we will automatically detect directories that are named trigger in your project, but we recommend specifying the directories explicitly. The dirs option is an array of strings, so you can specify multiple directories if you have tasks in multiple locations.
We will search for TypeScript and JavaScript files in the specified directories and include them in the build process. We automatically exclude files that have .test or .spec in the name, but you can customize this by specifying glob patterns in the ignorePatterns option:
import { defineConfig } from "@trigger.dev/sdk";

export default defineConfig({
  project: "<project ref>",
  dirs: ["./trigger"],
  ignorePatterns: ["**/*.my-test.ts"],
});
Custom tsconfig path
You can specify a custom path to your tsconfig file. This is useful if you have a custom tsconfig file that you want to use.
import { defineConfig } from "@trigger.dev/sdk";

export default defineConfig({
  project: "<project ref>",
  dirs: ["./trigger"],
  tsconfig: "./custom-tsconfig.json", // Custom tsconfig path
});
Lifecycle functions
You can add lifecycle functions to get notified when any task starts, succeeds, or fails using onStart, onSuccess and onFailure:
import { defineConfig } from "@trigger.dev/sdk";

export default defineConfig({
  project: "<project ref>",
  // Your other config settings...
  onSuccess: async ({ payload, output, ctx }) => {
    console.log("Task succeeded", ctx.task.id);
  },
  onFailure: async ({ payload, error, ctx }) => {
    console.log("Task failed", ctx.task.id);
  },
  onStart: async ({ payload, ctx }) => {
    console.log("Task started", ctx.task.id);
  },
  init: async ({ payload, ctx }) => {
    console.log("I run before any task is run");
  },
});
Instrumentations
We use OpenTelemetry (OTEL) for our run logs. This means you get a lot of information about your tasks with no effort. But you probably want to add more information to your logs. For example, here’s all the Prisma calls automatically logged:
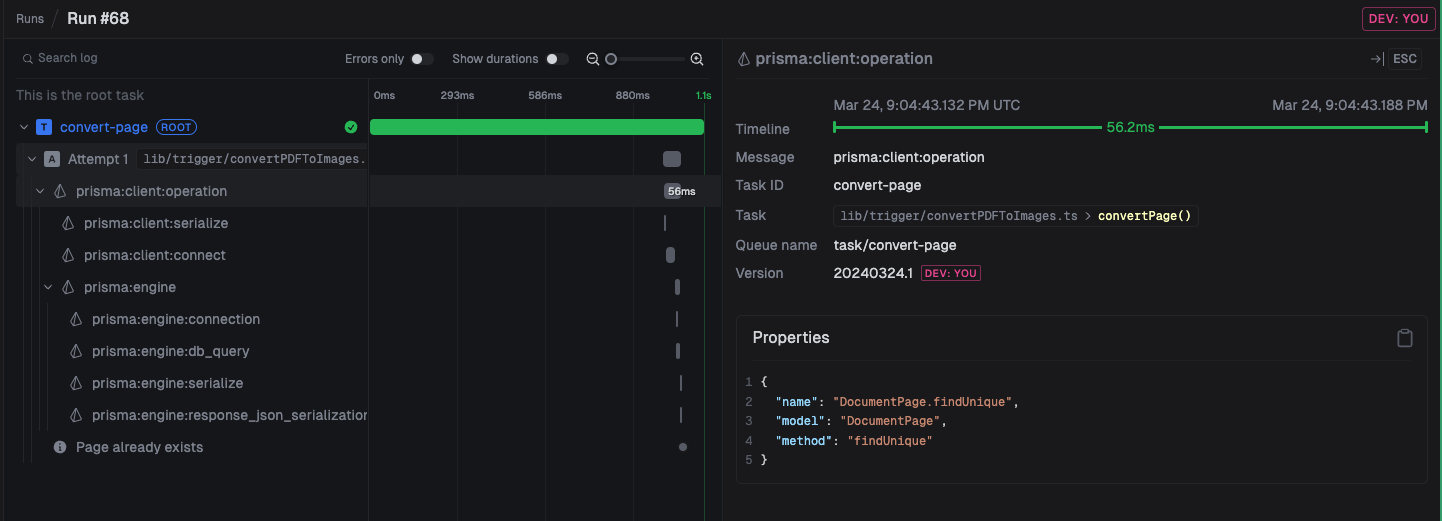 Here we add Prisma and OpenAI instrumentations to your
 trigger.config.ts file.
import { defineConfig } from "@trigger.dev/sdk";
import { PrismaInstrumentation } from "@prisma/instrumentation";
import { OpenAIInstrumentation } from "@traceloop/instrumentation-openai";

export default defineConfig({
  project: "<project ref>",
  // Your other config settings...
  telemetry: {
    instrumentations: [new PrismaInstrumentation(), new OpenAIInstrumentation()],
  },
});
| Package | Description |
|---|
@opentelemetry/instrumentation-http | Logs all HTTP calls |
@prisma/instrumentation | Logs all Prisma calls, you need to enable tracing |
@traceloop/instrumentation-openai | Logs all OpenAI calls |
@opentelemetry/instrumentation-fs which logs all file system calls is currently not supported.
Telemetry Exporters
You can also configure custom telemetry exporters to send your traces, logs, and metrics to other external services. For example, you can send your logs to Axiom. First, add the opentelemetry exporter packages to your package.json file:
"dependencies": {
  "@opentelemetry/exporter-logs-otlp-http": "0.52.1",
  "@opentelemetry/exporter-trace-otlp-http": "0.52.1",
  "@opentelemetry/exporter-metrics-otlp-proto": "0.52.1"
}
Axiom’s /v1/metrics endpoint only supports protobuf (application/x-protobuf), not JSON. Use
@opentelemetry/exporter-metrics-otlp-proto instead of
@opentelemetry/exporter-metrics-otlp-http for metrics. Traces and logs work fine with the
-http (JSON) exporters.
trigger.config.ts file:
import { defineConfig } from "@trigger.dev/sdk";
import { OTLPTraceExporter } from "@opentelemetry/exporter-trace-otlp-http";
import { OTLPLogExporter } from "@opentelemetry/exporter-logs-otlp-http";
import { OTLPMetricExporter } from "@opentelemetry/exporter-metrics-otlp-proto";

// Initialize OTLP trace exporter with the endpoint URL and headers;
export default defineConfig({
  project: "<project ref>",
  // Your other config settings...
  telemetry: {
    instrumentations: [
      // Your instrumentations here
    ],
    logExporters: [
      new OTLPLogExporter({
        url: "https://api.axiom.co/v1/logs",
        headers: {
          Authorization: `Bearer ${process.env.AXIOM_API_TOKEN}`,
          "X-Axiom-Dataset": process.env.AXIOM_DATASET,
        },
      }),
    ],
    exporters: [
      new OTLPTraceExporter({
        url: "https://api.axiom.co/v1/traces",
        headers: {
          Authorization: `Bearer ${process.env.AXIOM_API_TOKEN}`,
          "X-Axiom-Dataset": process.env.AXIOM_DATASET,
        },
      }),
    ],
    metricExporters: [
      new OTLPMetricExporter({
        url: "https://api.axiom.co/v1/metrics",
        headers: {
          Authorization: `Bearer ${process.env.AXIOM_API_TOKEN}`,
          "x-axiom-metrics-dataset": process.env.AXIOM_METRICS_DATASET,
        },
      }),
    ],
  },
});
AXIOM_API_TOKEN, AXIOM_DATASET, and AXIOM_METRICS_DATASET environment variables in your project. Axiom requires a separate, dedicated dataset for metrics — you cannot reuse the same dataset for traces/logs and metrics.
It’s important to note that you cannot configure exporters using OTEL_* environment variables, as they would conflict with our internal telemetry. Instead you should configure the exporters via passing in arguments to the OTLPTraceExporter, OTLPLogExporter, and OTLPMetricExporter constructors. For example, here is how you can configure exporting to Honeycomb:
import { defineConfig } from "@trigger.dev/sdk";
import { OTLPTraceExporter } from "@opentelemetry/exporter-trace-otlp-http";
import { OTLPLogExporter } from "@opentelemetry/exporter-logs-otlp-http";
import { OTLPMetricExporter } from "@opentelemetry/exporter-metrics-otlp-http";

// Initialize OTLP trace exporter with the endpoint URL and headers;
export default defineConfig({
  project: "<project ref>",
  // Your other config settings...
  telemetry: {
    instrumentations: [
      // Your instrumentations here
    ],
    logExporters: [
      new OTLPLogExporter({
        url: "https://api.honeycomb.io/v1/logs",
        headers: {
          "x-honeycomb-team": process.env.HONEYCOMB_API_KEY,
          "x-honeycomb-dataset": process.env.HONEYCOMB_DATASET,
        },
      }),
    ],
    exporters: [
      new OTLPTraceExporter({
        url: "https://api.honeycomb.io/v1/traces",
        headers: {
          "x-honeycomb-team": process.env.HONEYCOMB_API_KEY,
          "x-honeycomb-dataset": process.env.HONEYCOMB_DATASET,
        },
      }),
    ],
    metricExporters: [
      new OTLPMetricExporter({
        url: "https://api.honeycomb.io/v1/metrics",
        headers: {
          "x-honeycomb-team": process.env.HONEYCOMB_API_KEY,
          "x-honeycomb-dataset": process.env.HONEYCOMB_DATASET,
        },
      }),
    ],
  },
});
Runtime
We currently only officially support the node runtime, but you can try our experimental bun runtime by setting the runtime option in your config file:
import { defineConfig } from "@trigger.dev/sdk";

export default defineConfig({
  project: "<project ref>",
  // Your other config settings...
  runtime: "bun",
});
Node.js versions
Trigger.dev runs your tasks on specific Node.js versions:
- Node.js
21.7.3 (default)
- Node.js
22.16.0 (node-22)
- Bun
1.3.3 (bun)
You can change the runtime by setting the runtime field in your trigger.config.ts file.
import { defineConfig } from "@trigger.dev/sdk";

export default defineConfig({
  // "node", "node-22" or "bun"
  runtime: "node-22",
  project: "<your-project-ref>",
});
Default machine
You can specify the default machine for all tasks in your project:
import { defineConfig } from "@trigger.dev/sdk";

export default defineConfig({
  project: "<project ref>",
  // Your other config settings...
  machine: "large-1x",
});
Log level
You can set the log level for your project:
import { defineConfig } from "@trigger.dev/sdk";

export default defineConfig({
  project: "<project ref>",
  // Your other config settings...
  logLevel: "debug",
});
logLevel only determines which logs are sent to the Trigger.dev instance when using the logger API. All console based logs are always sent.
Console logging
You can control console logging behavior in development:
import { defineConfig } from "@trigger.dev/sdk";

export default defineConfig({
  project: "<project ref>",
  // Your other config settings...
  enableConsoleLogging: true, // Enable console logging while running dev CLI
  disableConsoleInterceptor: false, // Disable console interceptor (prevents logs from being sent to the trigger.dev dashboard)
});
Max duration
You can set the default maxDuration for all tasks in your project:
import { defineConfig } from "@trigger.dev/sdk";

export default defineConfig({
  project: "<project ref>",
  // Your other config settings...
  maxDuration: 60, // 60 seconds
});
TTL
You can set a default time-to-live (TTL) for all task runs in your project. If a run is not dequeued within this time, it will expire and never execute.
import { defineConfig } from "@trigger.dev/sdk";

export default defineConfig({
  project: "<project ref>",
  // Your other config settings...
  ttl: "1h", // Also accepts a number of seconds, e.g. 3600
});
ttl on the task definition, or per-trigger by passing ttl in the trigger options. To opt a specific task out of the config-level TTL, set ttl: 0 on the task. See Time-to-live (TTL) for more information.
Process keep alive
Keep the process alive after the task has finished running so the next task doesn’t have to wait for the process to start up again.
Note that the process could be killed at any time, and we don’t make any guarantees about the process being alive for a certain amount of time
import { defineConfig } from "@trigger.dev/sdk";

export default defineConfig({
  project: "<project ref>",
  // Your other config settings...
  processKeepAlive: true,
});
processKeepAlive option to configure the behavior:
import { defineConfig } from "@trigger.dev/sdk";

export default defineConfig({
  project: "<project ref>",
  // Your other config settings...
  processKeepAlive: {
    enabled: true,
    // The maximum number of executions per process. If the process has run more than this number of times, it will be killed.
    maxExecutionsPerProcess: 50, // Default: 50
    // The maximum number of concurrent processes to keep alive in dev.
    devMaxPoolSize: 25, // Default: 25
  },
});
Development behavior
You can control the working directory behavior in development:
import { defineConfig } from "@trigger.dev/sdk";

export default defineConfig({
  project: "<project ref>",
  // Your other config settings...
  legacyDevProcessCwdBehaviour: false, // Default: true
});
false, the current working directory will be set to the build directory, which more closely matches production behavior.
CA certificates
CA Cert file to be added to NODE_EXTRA_CA_CERT environment variable, useful in use with self signed cert in the trigger.dev environment.
import { defineConfig } from "@trigger.dev/sdk";

export default defineConfig({
  project: "<project ref>",
  // Your other config settings...
  // Must start with "./" and be relative to project root
  extraCACerts: "./certs/ca.crt",
});
Build configuration
You can customize the build process using the build option:
import { defineConfig } from "@trigger.dev/sdk";

export default defineConfig({
  project: "<project ref>",
  // Your other config settings...
  build: {
    // Don't bundle these packages
    external: ["header-generator"],
    // Automatically detect external dependencies (default: true)
    autoDetectExternal: true,
    // Keep function/class names in bundle (default: true)
    keepNames: true,
    // Minify generated code (default: false, experimental)
    minify: false,
  },
});
The trigger.config.ts file is included in the bundle, but with the build configuration
stripped out. These means any imports only used inside the build configuration are also removed
from the final bundle.
External
All code is bundled by default, but you can exclude some packages from the bundle using the external option:
import { defineConfig } from "@trigger.dev/sdk";

export default defineConfig({
  project: "<project ref>",
  // Your other config settings...
  build: {
    external: ["header-generator"],
  },
});
node_modules directory.
Each entry in the external should be a package name, not necessarily the import path. For example, if you want to exclude the ai package, but you are importing ai/rsc, you should just include ai in the external array:
import { defineConfig } from "@trigger.dev/sdk";

export default defineConfig({
  project: "<project ref>",
  // Your other config settings...
  build: {
    external: ["ai"],
  },
});
WebAssembly (WASM) packages
Packages that use WebAssembly (WASM) must be added to the external array. WASM files are binary modules that need to be loaded at runtime and cannot be bundled into JavaScript code. When you add a WASM package to external, the package will be installed as a dependency in the runtime environment, ensuring the WASM files are available at their expected paths.
import { defineConfig } from "@trigger.dev/sdk";

export default defineConfig({
  project: "<project ref>",
  // Your other config settings...
  build: {
    external: ["your-wasm-package-name"],
  },
});
Any packages that install or build a native binary or use WebAssembly (WASM) should be added to
external, as they cannot be bundled. For example, re2, sharp, sqlite3, and WASM packages
should be added to external.
JSX
You can customize the jsx options that are passed to esbuild using the jsx option:
import { defineConfig } from "@trigger.dev/sdk";

export default defineConfig({
  project: "<project ref>",
  // Your other config settings...
  build: {
    jsx: {
      // Use the Fragment component instead of React.Fragment
      fragment: "Fragment",
      // Use the h function instead of React.createElement
      factory: "h",
      // Turn off automatic runtime
      automatic: false,
    },
  },
});
React in your JSX files. You can disable this by setting automatic to false.
See the esbuild JSX documentation for more information.
Conditions
You can add custom import conditions to your build using the conditions option:
import { defineConfig } from "@trigger.dev/sdk";

export default defineConfig({
  project: "<project ref>",
  // Your other config settings...
  build: {
    conditions: ["react-server"],
  },
});
react-server condition will resolve ai/rsc to the server version of the ai/rsc export.
Custom conditions will also be passed to the node runtime when running your tasks.
Extensions
Build extension allow you to hook into the build system and customize the build process or the resulting bundle and container image (in the case of deploying). You can use pre-built extensions by installing the @trigger.dev/build package into your devDependencies, or you can create your own.
additionalFiles
See the additionalFiles documentation for more information.
additionalPackages
See the additionalPackages documentation for more information.
See the emitDecoratorMetadata documentation for more information.
Prisma
See the prismaExtension documentation for more information.
syncEnvVars
See the syncEnvVars documentation for more information.
puppeteer
See the puppeteer documentation for more information.
ffmpeg
See the ffmpeg documentation for more information.
esbuild plugins
See the esbuild plugins documentation for more information.
aptGet
See the aptGet documentation for more information.