What are Trigger.dev agent rules?
Trigger.dev agent rules are comprehensive instruction sets that guide AI assistants to write optimal Trigger.dev code. These rules ensure your AI assistant understands best practices, current APIs, and recommended patterns when working with Trigger.dev projects.Installation
Install the agent rules with the following command:Available rule sets
We provide five specialized rule sets, each optimized for different aspects of Trigger.dev development:| Rule set | Tokens | Description | GitHub |
|---|---|---|---|
| Basic tasks | 1,200 | Essential rules for writing basic Trigger.dev tasks and fundamental patterns | View |
| Advanced tasks | 3,000 | Comprehensive rules for complex workflows, error handling, and advanced task patterns | View |
| Scheduled tasks | 780 | Specialized guidance for cron jobs, scheduled workflows, and time-based triggers | View |
| Configuration | 1,900 | Complete guide for trigger.config.ts setup, environment configuration, and project structure | View |
| Realtime | 1,700 | Using Trigger.dev Realtime features and frontend integration patterns | View |
Claude Code subagent
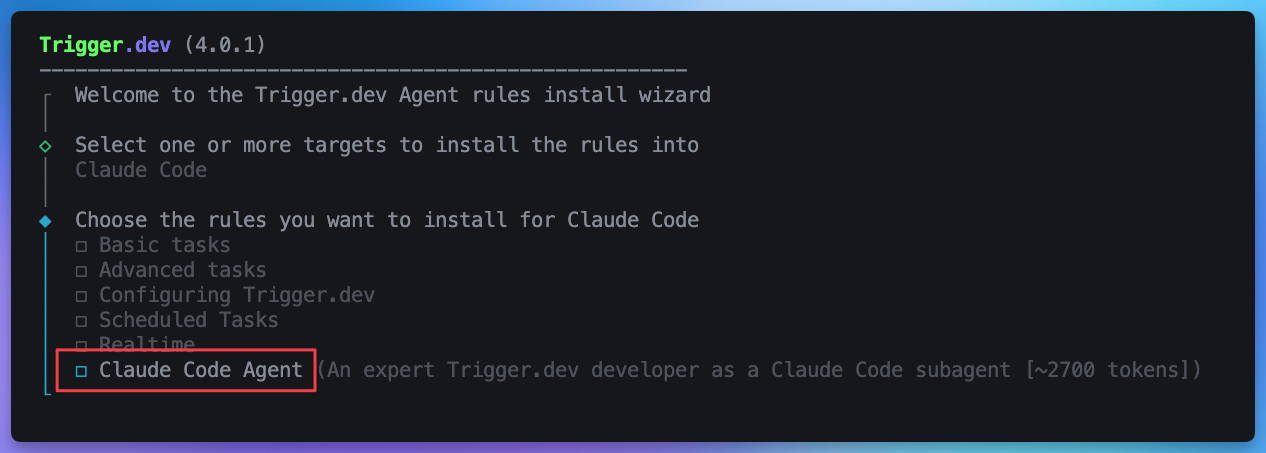
For Claude Code users, we provide a subagent calledtrigger-dev-expert that’s an expert at writing well-structured Trigger.dev code.
Installation
The subagent is available as an option when running the rules installation command. Select “Claude Code” as your client and choose to include the subagent when prompted.
Usage
Activate the subagent in your prompts by requesting it explicitly:Supported AI clients
The Trigger.dev rules work across a wide range of AI coding assistants and editors:| Client | Rule activation | Docs |
|---|---|---|
| Cursor | Automatic when working in trigger directories | Link |
| Claude Code | Context-aware activation + custom subagent | Link |
| VSCode Copilot | Integration with GitHub Copilot chat | Link |
| Windsurf | Automatic activation in Trigger.dev projects | Link |
| Gemini CLI | Command-line integration | Link |
| Cline | Automatic context detection | Link |
| Sourcegraph AMP | Code intelligence integration | Link |
| Kilo | Custom rule integration | Link |
| Ruler | Rule management | Link |
| AGENTS.md | Universal format for OpenAI Codex, Jules, OpenCode, etc. |
Rule activation behavior
Different AI tools handle rules differently:- Automatic Activation: Cursor, Windsurf, VSCode Copilot, and Cline automatically apply relevant rules when working in Trigger.dev projects or when
trigger.config.tsis detected - Context-Aware: Claude Code intelligently applies rules based on the current context and file types
- Manual Integration: AGENTS.md clients and others append rules to configuration files for manual activation
Keeping rules updated
Trigger.dev rules are regularly updated to reflect new features, API changes, and best practices. The CLI includes automatic update detection.Automatic update notifications
When runningnpx trigger.dev@latest dev, you’ll receive notifications when newer rule versions are available with a simple update command.
Manual updates
Update rules anytime with:Why updates matter
- Current API patterns: Access the latest Trigger.dev APIs and features
- Performance optimizations: Benefit from improved patterns and practices
- Deprecated pattern avoidance: Prevent AI assistants from generating outdated code
- New feature support: Immediate access to newly released capabilities
Getting started
- Install the rules:
- Follow the prompts to install the rules for your AI client.
-
Consider installing the
trigger-dev-expertsubagent if using Claude Code.
Next steps
- Install the MCP server for complete Trigger.dev integration
- Explore MCP tools for project management and task execution

