Should you self-host?
Trigger.dev Cloud is fully managed, scalable, and comes with dedicated support. For most users, it offers the best experience. However, if you have specific requirements around data residency, compliance, or infrastructure control, self-hosting may be the right choice for you. The self-hosted version is functionally the same as Trigger.dev Cloud with some exceptions, but our managed Cloud infrastructure is designed for high availability, security, and scale. Because we don’t manage self-hosted instances, we cannot guarantee how Trigger.dev will perform on your infrastructure. You assume all responsibility and risk for your deployment, including security, uptime, and data integrity. For more details, carry on reading and follow our guides for instructions on setting up a self-hosted Trigger.dev instance. If you prefer a managed experience, you can sign up for our Cloud offering instead - we have a generous free tier for you to try it out.Architecture
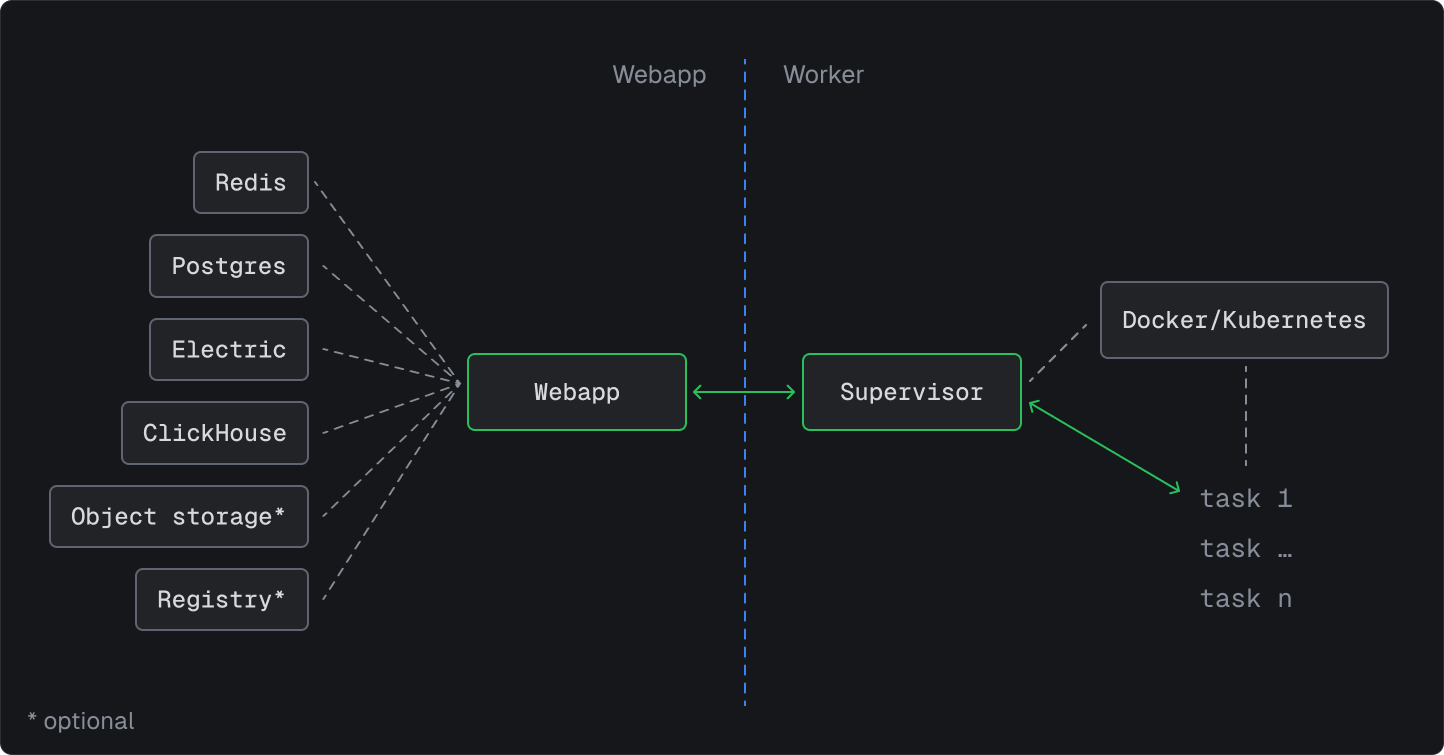
The self-hosted version is a set of containers running on your own infrastructure. It’s split into two parts that can be scaled independently:- Webapp: includes the dashboard and other services like Redis and Postgres.
- Worker: includes the supervisor and the runners that execute your tasks.
Feature comparison
While limits are generally configurable when self-hosting, some features are only available on Trigger.dev Cloud:Limits
Most of the limits are configurable when self-hosting, with some hardcoded exceptions. You can configure them via environment variables on the webapp container.Machine overrides
You can override the machine type for a task by setting theMACHINE_PRESETS_OVERRIDE_PATH environment variable to a JSON file with the following structure.
Community support
It’s dangerous to go alone! Join the self-hosting channel on our Discord server.Next steps
Docker compose
Learn how to self-host Trigger.dev with Docker compose.
Kubernetes
Learn how to self-host Trigger.dev with Kubernetes.
Security
Report vulnerabilities and stay informed about security releases.