

process.env.MY_ENV_VAR.
We deploy your tasks and scale them up and down when they are triggered. So any environment variables you use in your tasks need to accessible to us so your code will run successfully.
In the dashboard
Setting environment variables
1
Go to the Environment Variables page
In the sidebar select the “Environment Variables” page, then press the “Add new”
button. 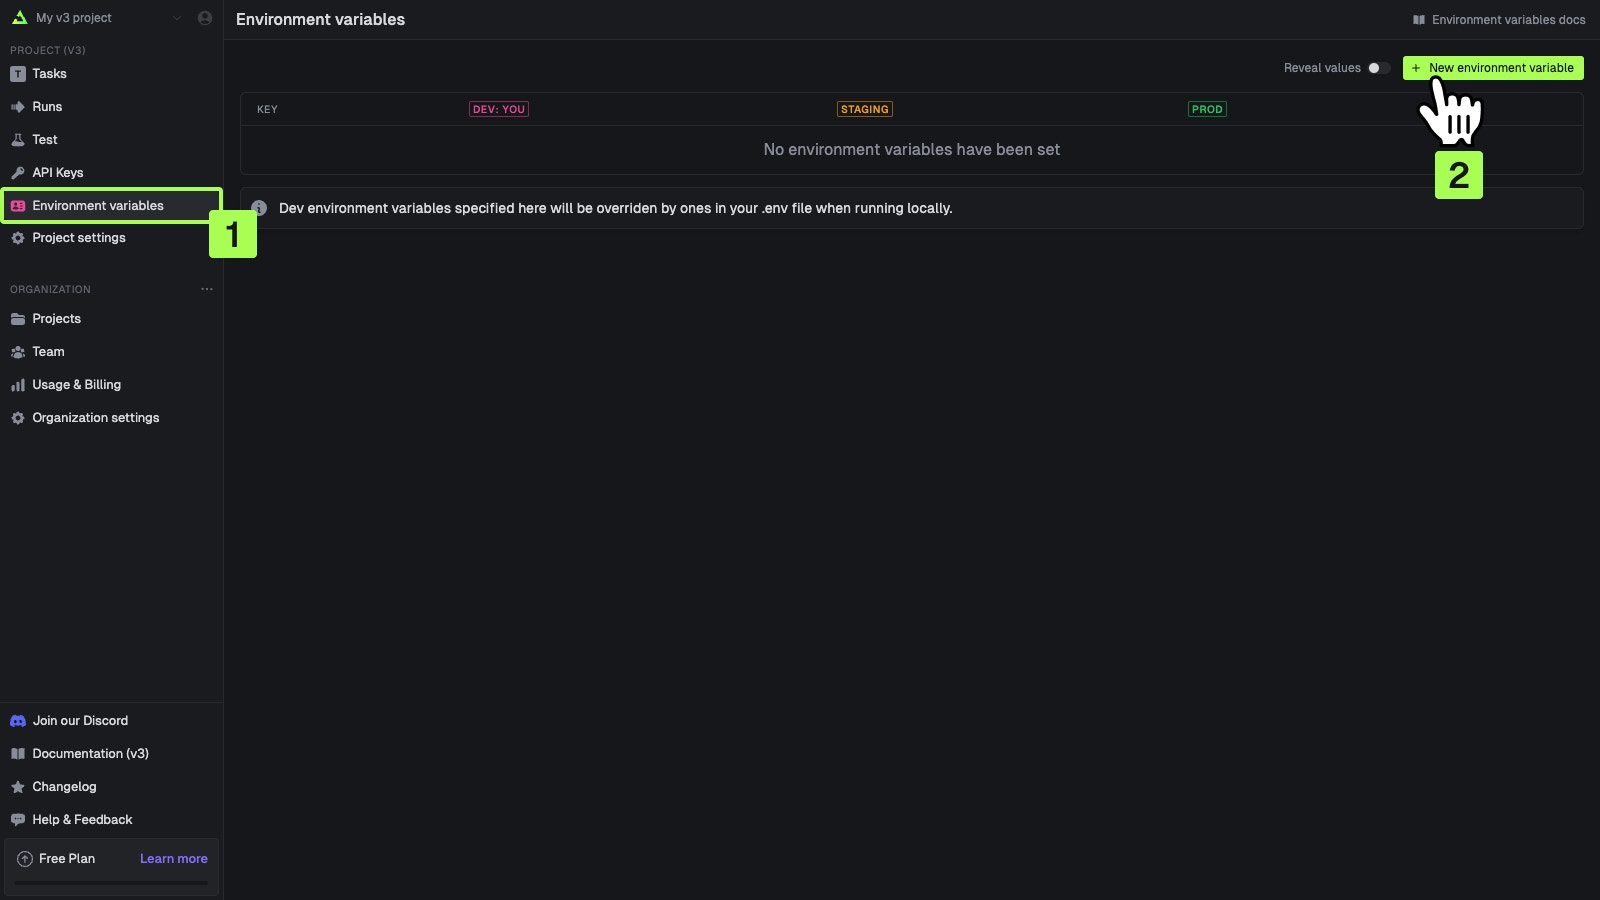
2
Add your environment variables
You can add values for your local dev environment, staging and prod. 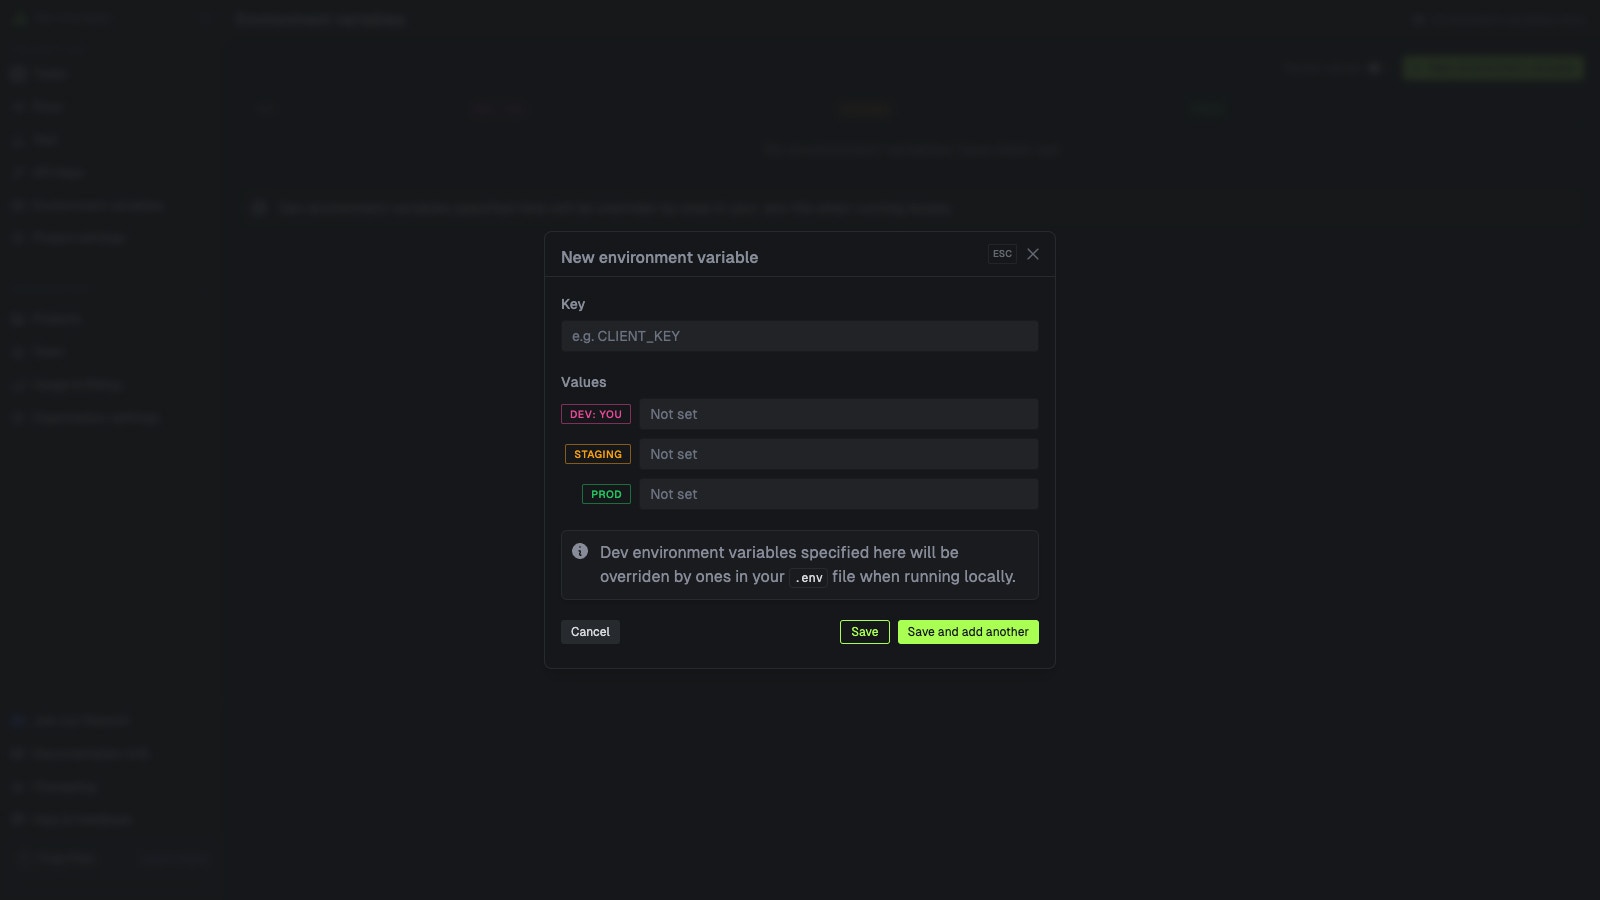
Specifying Dev values is optional. They will be overriden by values in your .env file when running
locally.
Secret environment variables
When creating an environment variable, you can mark it as a Secret. Secret values are hidden in the dashboard and cannot be viewed after creation.Editing environment variables
You can edit an environment variable’s values. You cannot edit the key name, you must delete and create a new one.An empty string is a valid value. Saving a variable with an empty value stores it as an empty
string (your task sees the variable set to
""), which is different from deleting the variable
(where your task does not see it at all).1
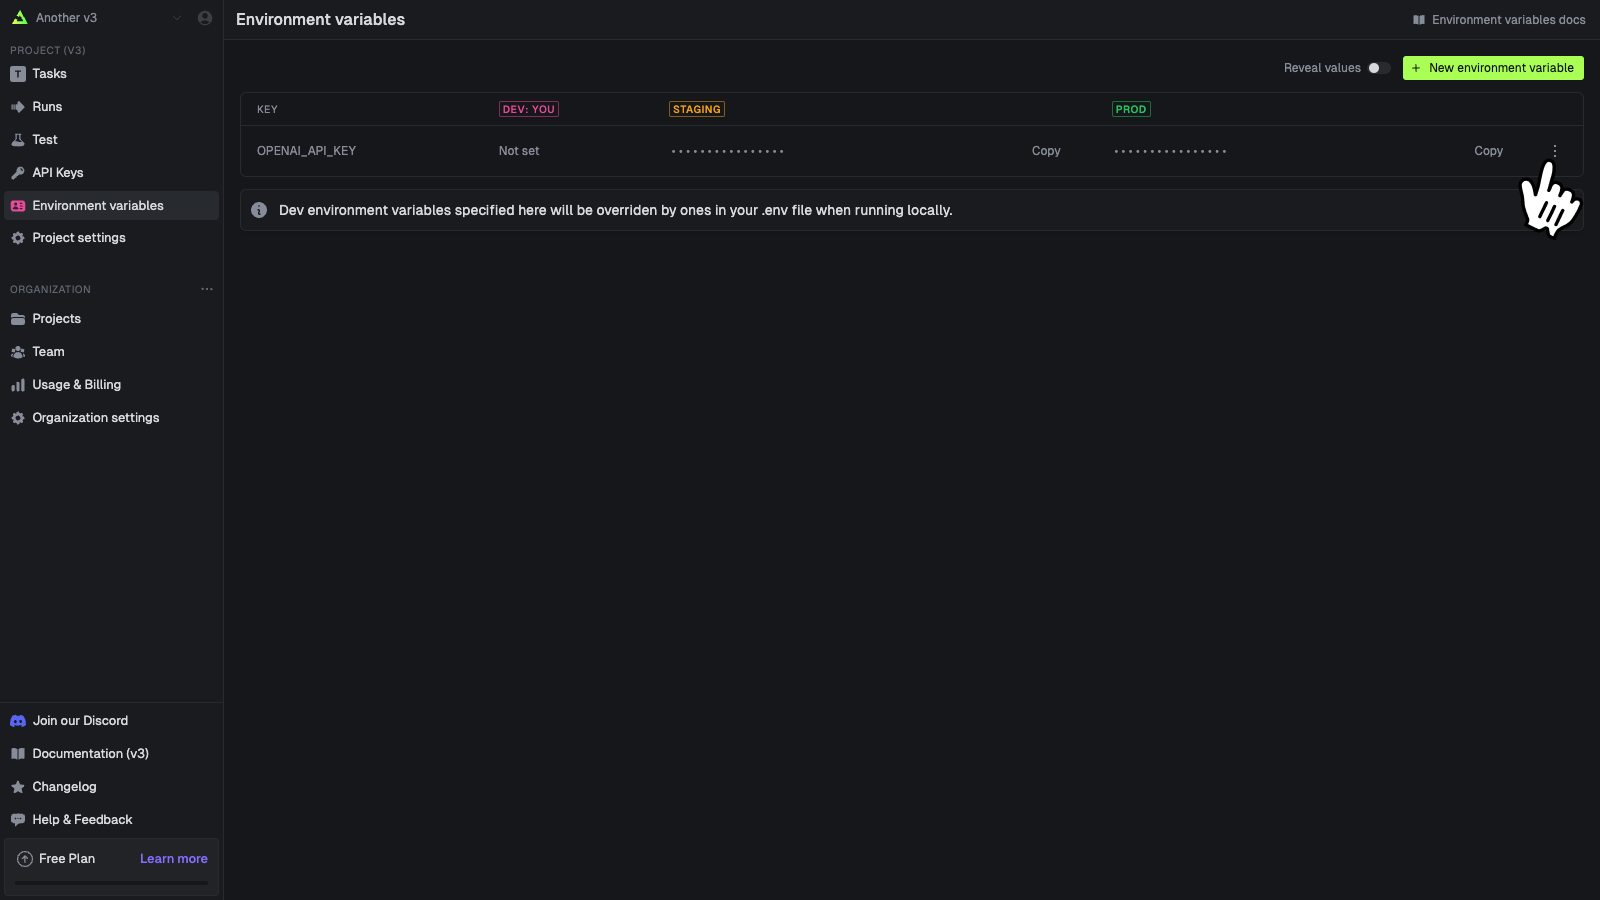
Press the action button on a variable
2
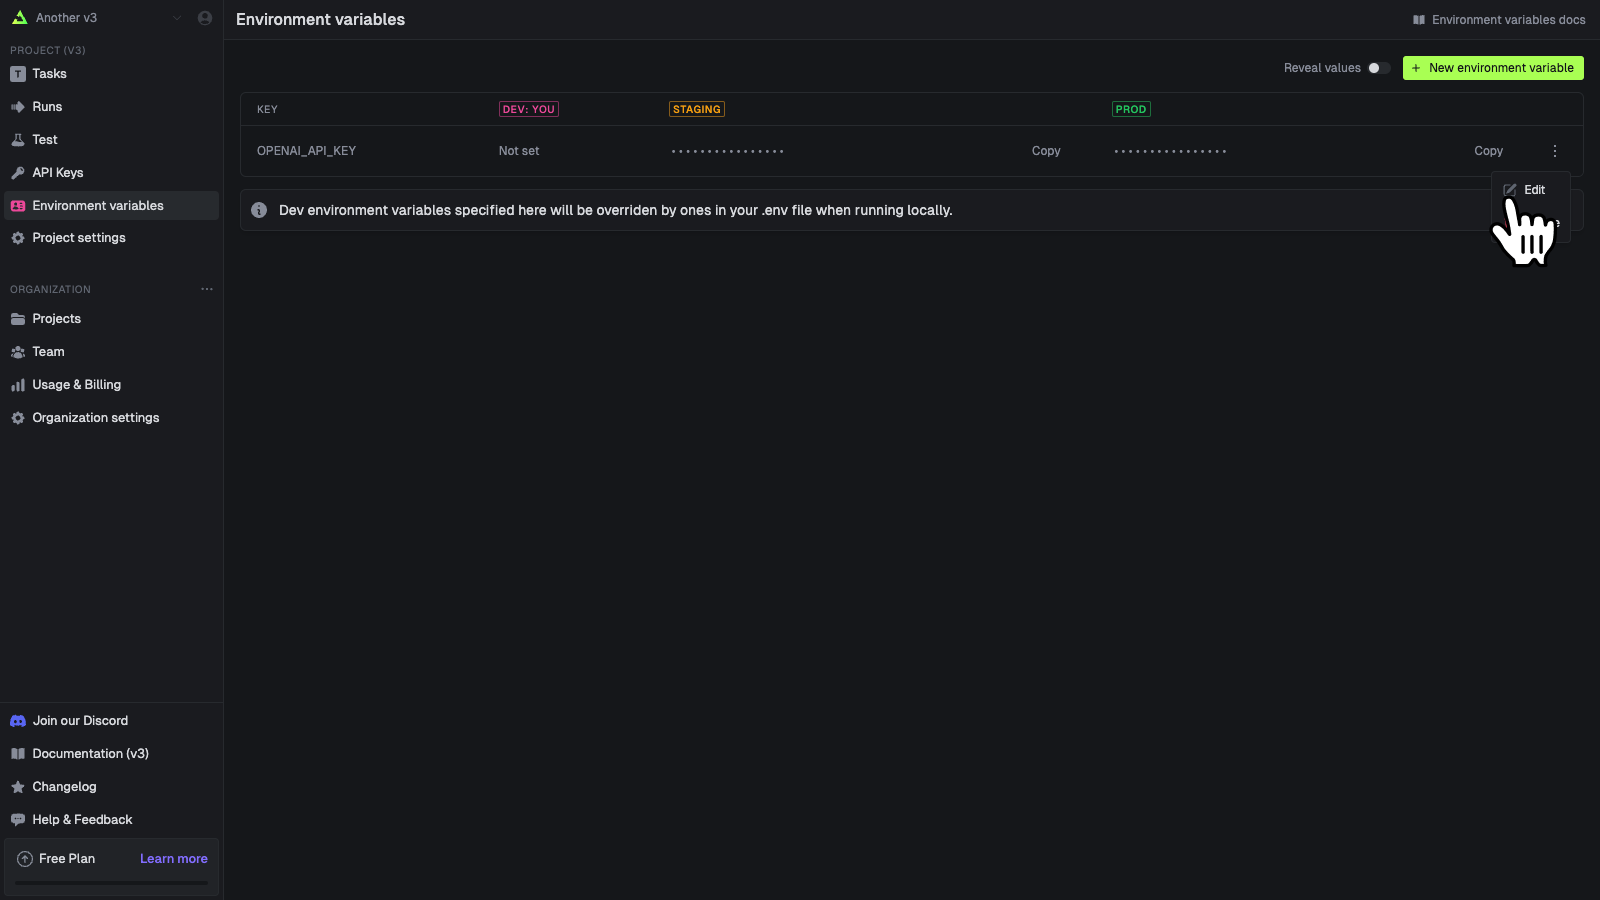
Press edit
Deleting environment variables
1
Press the action button on a variable
2
Press delete
Confirm in the dialog to delete the variable’s value from that environment. This can’t be
undone. 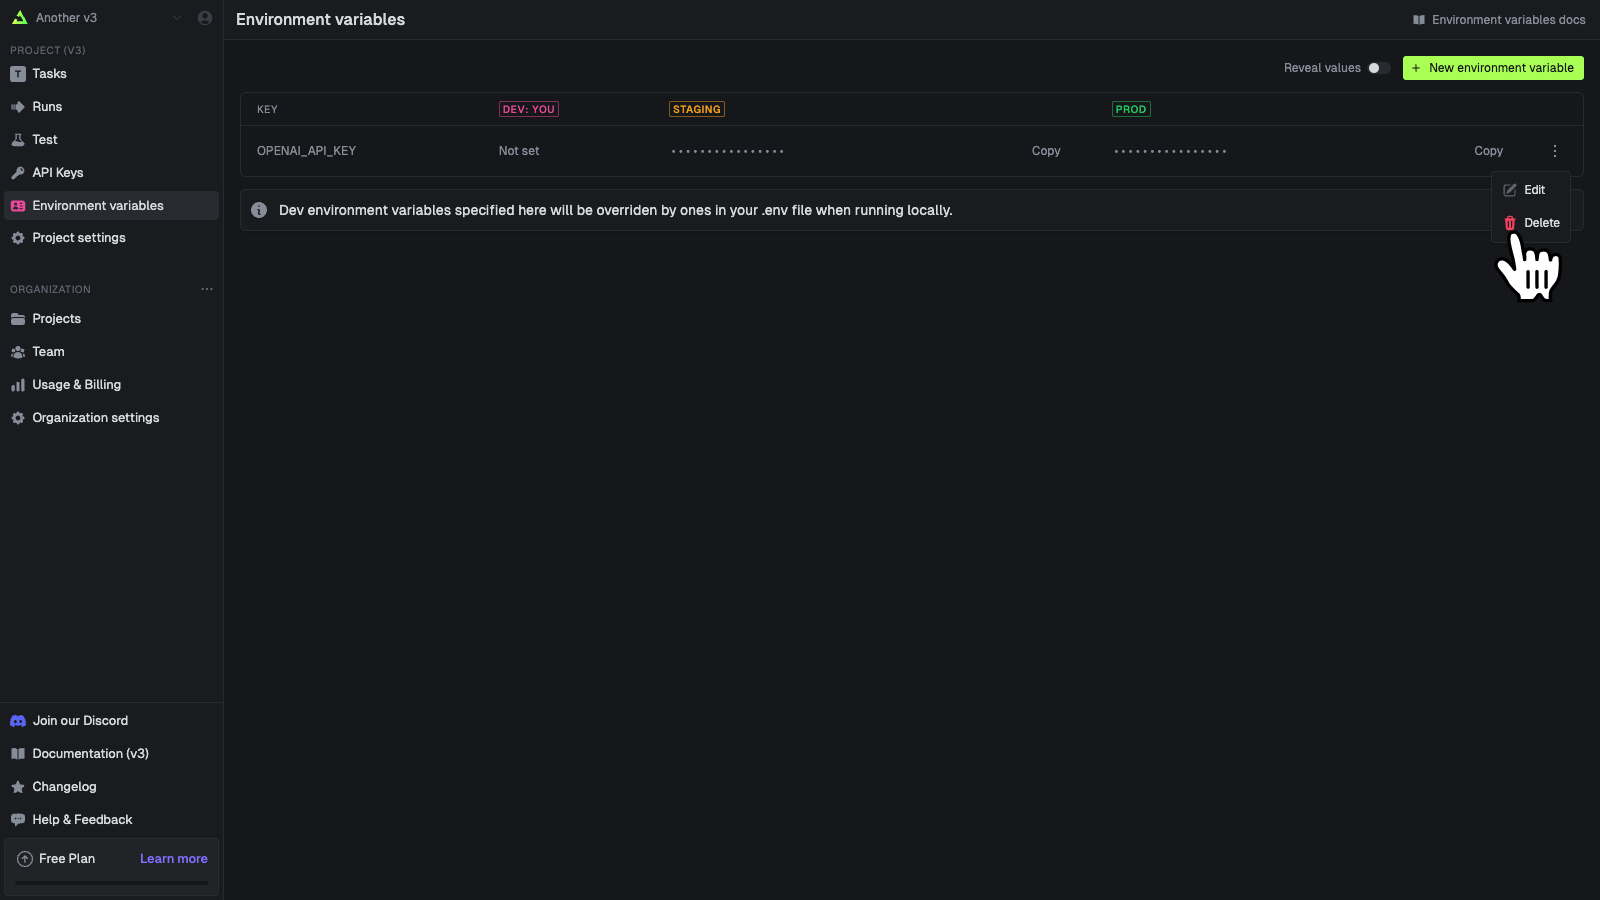
Deleting several values at once
Each row on the Environment Variables page is one value: a key in one environment or preview branch. You can select up to 100 values and delete them in one step.1
Tick the values to delete
Tick the checkbox on each row, or tick the checkbox in the table header to select the values on
the current page. Shift-click selects a range. A bar at the bottom of the list shows how many
values are selected.
2
Press Delete in the bar
The confirmation lists every selected value and counts them per environment.
3
Type the confirmation words and press Delete
The selected values are deleted together. If any of them can’t be deleted, none are.
Comparing two environments
The compare view lists the keys that differ between two environments, so you don’t have to read both lists side by side. Press Compare on the Environment Variables page to open it with the current environment on the left. Each side can be your Dev environment, Staging, Prod, Preview or one preview branch: pick them in the column headers. The two sides are in the URL, so you can share a comparison. The filters narrow the list:
Secrets are compared on the server: the view says whether two secrets are the same or different, and never shows either value. A secret is never compared with a plain value, because the plain value on the page would reveal the secret; such keys are listed under All and say they weren’t compared. A side you don’t have permission to read shows “Permission denied” and is never compared.
Comparing a preview branch with Preview lists the branch’s own overrides. To compare only some keys, tick them on the Environment Variables page and press Compare in the bar. Up to 1,000 keys can be compared at once; above that, search to narrow them down or compare ticked keys.
Copying values across
You can copy values from one side of the comparison to the other, in either direction.1
Choose the values
Hover a row and press Copy to with the target environment’s name, or tick up to 100 rows and
press Copy to in the bar at the bottom of the list.
2
Confirm
The dialog says which keys are added to the target and which existing values are replaced, and
which ticked keys are skipped (not set or not readable on the source side, already the same, or
empty when your organization doesn’t allow empty values). Copying several values asks you to type
two words to confirm.
Values that need attention
The Needs attention page lists the keys in one environment that are probably wrong or worth a second look. Press Needs attention on the Environment Variables page to open it; the button shows how many keys need attention in the current environment, leaving out empty values. Pick the environment (your Dev environment, Staging, Prod or Preview) in the value column’s header.
A Missing here row offers Copy from to copy the value from an environment where it’s set, through the same confirmation as copying values across, or Set to enter a new one.
Ignore a reason when it’s expected, such as a key that is only meant to exist in Prod. An ignore applies to one key, in one environment, for one reason, and is shared with everyone on the project, who see who ignored it and when. Ignored reasons move to the Ignored tab until someone presses Stop ignoring. An ignored empty value stops being ignored the next time the value is saved. Changed recently can’t be ignored: a key leaves that tab a day after it was saved.
Local development
When runningnpx trigger.dev dev, the CLI automatically loads environment variables from these files in order (later files override any duplicate keys from earlier ones):
.env.env.development.env.local.env.development.localdev.vars
process.env. You don’t need to use the --env-file flag for this automatic loading.
In your code
You can use our SDK to get and manipulate environment variables. You can also easily sync environment variables from another service into Trigger.dev.Directly manipulating environment variables
We have a complete set of SDK functions (and REST API) you can use to directly manipulate environment variables.Initial load from .env file
To initially load environment variables from a.env file into your Trigger.dev cloud environment, you can use envvars.upload(). This is useful for one-time bulk imports when setting up a new project or environment.
This is different from
syncEnvVars which automatically syncs variables during every deploy. Use envvars.upload() for one-time initial loads, and syncEnvVars for ongoing synchronization.Getting the current environment
When usingenvvars.retrieve() inside a task, you can access the current environment information from the task context (ctx). The envvars.retrieve() function doesn’t return the environment, but you can get it from ctx.environment:
ctx.environment.slug- The environment slug (e.g., “dev”, “prod”)ctx.environment.type- The environment type (“DEVELOPMENT”, “PRODUCTION”, “STAGING”, or “PREVIEW”)ctx.environment.id- The environment IDctx.project.ref- The project reference
Linking to a run in the dashboard
Trigger.dev setsTRIGGER_DASHBOARD_URL on every run, in development and deployed environments. Its value is the dashboard’s address without a trailing slash, so it also points at your own instance when you self-host. Append /runs/<runId> to link to a run:
/runs/<runId> link checks that the viewer is a member of the run’s organization, then redirects to the full run page. If you set your own TRIGGER_DASHBOARD_URL environment variable on the project, your value is used instead.
Sync env vars from another service
There are two ways to pull secrets from another service into Trigger.dev: a native Secret Sync (currently Infisical), or thesyncEnvVars build extension for any other service.
Infisical Secret Sync
If your secrets live in Infisical, sync them natively, without a build extension or a redeploy. You configure the sync in the Infisical dashboard, and it pushes secrets straight to your Environment Variables page in Trigger.dev. When a secret changes in Infisical the sync updates the matching variable, and your tasks pick up the new value on their next run. Set it up in Infisical in two steps:- Add a Trigger.dev App Connection using a Trigger.dev Personal Access Token from your account settings. Self-hosted instances are supported. The token expires on the date you choose, so replace it in the App Connection before then to keep the sync running.
- Create a Secret Sync: choose the connection, pick the target organization, project and environment (Production, Staging, Development, or Preview), and set the secret path to sync.
A Secret Sync only overwrites the keys it manages, leaving variables you set manually untouched.
Synced variables are marked as secret by default, so they appear
redacted on the Environment Variables page.
Using the syncEnvVars build extension
For any other service, use our syncEnvVars build extension in your trigger.config file to resolve secrets at deploy time.
To use the
syncEnvVars build extension, you should first install the @trigger.dev/build
package into your devDependencies.trigger.config.ts
Syncing environment variables from Vercel
To sync environment variables from your Vercel projects to Trigger.dev, you can use our build extension. Check out our syncing environment variables from Vercel guide.Deploy
When you run the CLI deploy command directly or using GitHub Actions it will sync the environment variables from Infisical to Trigger.dev. This means they’ll appear on the Environment Variables page so you can confirm that it’s worked. This means that you need to redeploy your Trigger.dev tasks if you change the environment variables in Infisical.The
process.env.INFISICAL_CLIENT_ID, process.env.INFISICAL_CLIENT_SECRET and
process.env.INFISICAL_PROJECT_ID will need to be supplied to the deploy CLI command. You can
do this via the --env-file .env flag or by setting them as environment variables in your
terminal.Dev
syncEnvVars does not have any effect when running the dev command locally. If you want to inject environment variables from another service into your local environment you can do so via a .env file or just supplying them as environment variables in your terminal. Most services will have a CLI tool that allows you to run a command with environment variables set:
The syncEnvVars callback return type
You can return env vars as an object with string keys and values, or an array of names + values.Using Google credential JSON files
Securely pass a Google credential JSON file to your Trigger.dev task using environment variables.1
Convert the Google credential file to base64
In your terminal, run the following command and copy the resulting base64 string:
2
Set up the environment variable in Trigger.dev
Follow these steps to set a new environment variable using the base64 string as the value.
3
Use the environment variable in your code
Add the following code to your Trigger.dev task:
4
Use the client in your code
You can now use the
client object to make authenticated requests to Google APIsUsing .env.production or dotenvx with Trigger.dev
Trigger.dev does not automatically load .env.production files or dotenvx files during deploys.To use these files in your Trigger.dev environment:
Option 1 — Manually add your environment variables
- Open your
.env.production(or.env) file - Copy the full contents
- Go to your Trigger.dev project → Environment Variables
- Click Add variables
- Paste the contents directly into the editor
.env.production variables into your Trigger.dev environment.
Option 2 — Sync variables automatically using syncEnvVars
If you’d prefer an automated flow, you can use the syncEnvVars build extension to programmatically load and return your variables:
- Trigger.dev does not automatically detect .env.production or dotenvx files
- You can paste them manually into the dashboard
- Or sync them automatically using a build extension
Multi-tenant applications
If you’re building a multi-tenant application where each tenant needs different environment variables (like tenant-specific API keys or database credentials), you don’t need a separate project for each tenant. Instead, use a single project and load tenant-specific secrets at runtime.This is different from syncing environment variables at deploy time.
Here, secrets are loaded dynamically during task execution, not synced to Trigger.dev’s environment variables.
Recommended approach
Use a secrets service (Infisical, AWS Secrets Manager, HashiCorp Vault, etc.) to store tenant-specific secrets, then retrieve them at the start of each task run based on the tenant identifier in your payload or context. Important: Never pass secrets in the task payload, as payloads are logged and visible in the dashboard.Example implementation
Benefits
- Single codebase - Deploy once, works for all tenants
- Secure - Secrets never appear in payloads or logs
- Scalable - No project limit constraints
- Flexible - Easy to add new tenants without redeploying