> ## Documentation Index
> Fetch the complete documentation index at: https://trigger.dev/docs/llms.txt
> Use this file to discover all available pages before exploring further.
# Send emails using React Email
> Learn how to send beautiful emails using React Email and Trigger.dev.
## Overview
This example demonstrates how to use Trigger.dev to send emails using [React Email](https://react.email/).
This example uses [Resend](https://resend.com) as the email provider. You can use other email
providers like [Loops](https://loops.so) or [SendGrid](https://sendgrid.com) etc. Full list of
their integrations can be found [here](https://react.email/docs/introduction#integrations).
## Task code
This email is built using React components. To use React components in your task, it must be a
.tsx file.
```tsx trigger/sendReactEmail.tsx theme={"theme":"css-variables"}
import { Body, Button, Container, Head, Heading, Html, Preview } from "@react-email/components";
import { logger, task } from "@trigger.dev/sdk";
import { Resend } from "resend";
// Initialize Resend client
const resend = new Resend(process.env.RESEND_API_KEY);
// React Email template component
const EmailTemplate = ({ name, message }: { name: string; message: string }) => (
Hello from Acme Inc.
Hi {name},
{message}
);
export const sendEmail = task({
id: "send-react-email",
run: async (payload: {
to: string;
name: string;
message: string;
subject: string;
from?: string;
}) => {
try {
logger.info("Sending email using React.email and Resend", {
to: payload.to,
});
// Send the email using Resend
const { data, error } = await resend.emails.send({
// The from address needs to be a verified email address you own
from: payload.from || "email@acmeinc.com", // Default from address
to: payload.to,
subject: payload.subject,
react: ,
});
if (error) {
logger.error("Failed to send email", { error });
throw new Error(`Failed to send email: ${error.message}`);
}
logger.info("Email sent successfully", { emailId: data?.id });
// Return the response from Resend
return {
id: data?.id,
status: "sent",
};
} catch (error) {
logger.error("Unexpected error sending email", { error });
throw error;
}
},
});
```
## The email
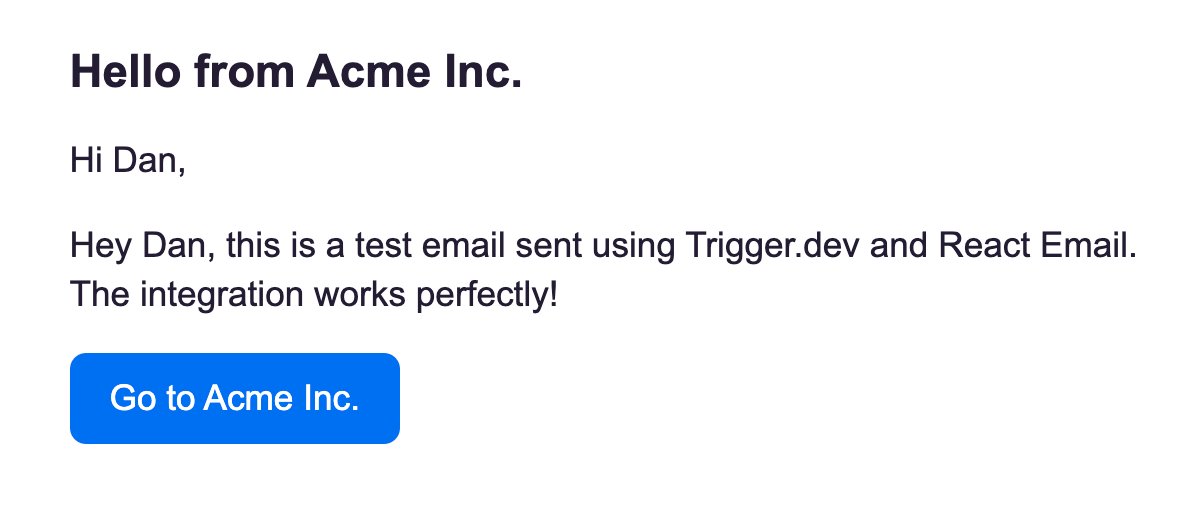
This example email should look like this:
This is just a simple implementation, you can customize the email to be as complex as you want. Check out the [React email templates](https://react.email/templates) for more inspiration.
## Testing your task
To test this task in the [dashboard](https://cloud.trigger.dev), you can use the following payload:
```json theme={"theme":"css-variables"}
{
"to": "recipient@example.com",
"name": "Jane Doe",
"message": "Thank you for signing up for our service!",
"subject": "Welcome to Acme Inc."
}
```
## Deploying your task
Deploy the task to production using the Trigger.dev CLI `deploy` command.
## Using Cursor / AI to build your emails
In this video you can see how we use Cursor to build a welcome email.
We recommend using our [Cursor rules](https://trigger.dev/changelog/cursor-rules-writing-tasks/) to help you build your tasks and emails.
#### Video: creating a new email template using Cursor
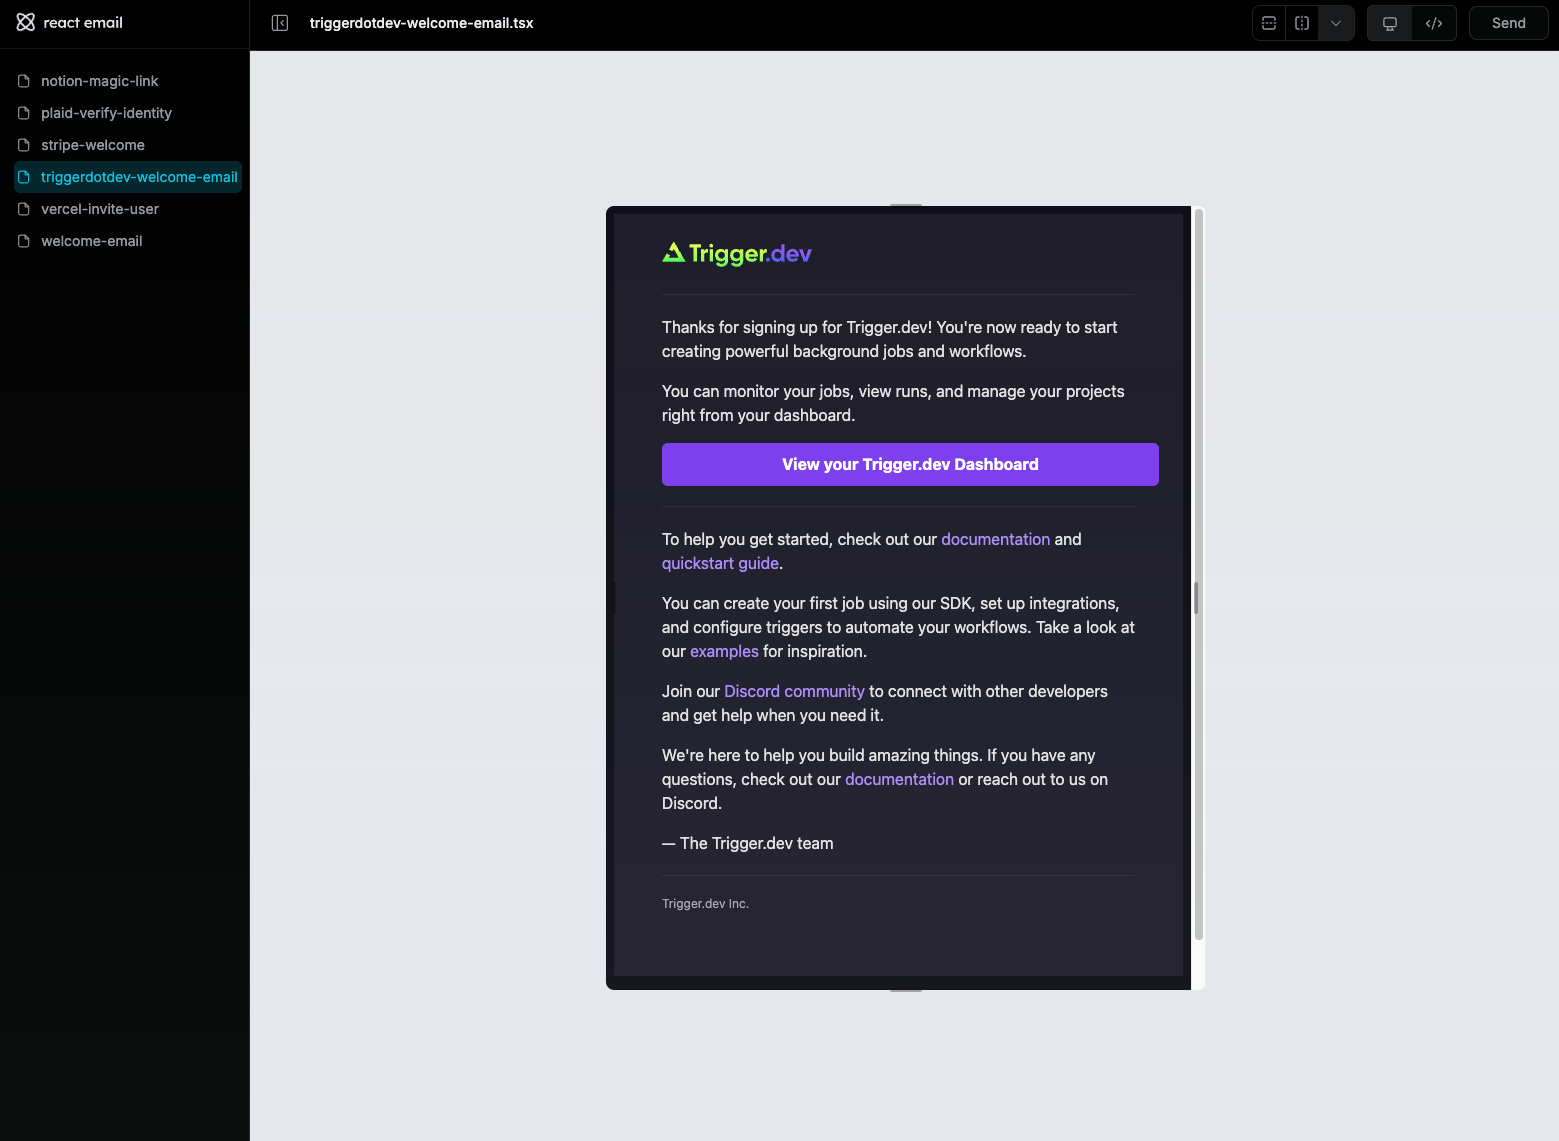
#### The generated email template
#### The generated code
```tsx emails/trigger-welcome-email.tsx theme={"theme":"css-variables"}
import {
Body,
Button,
Container,
Head,
Heading,
Hr,
Html,
Img,
Link,
Preview,
Section,
Text,
} from "@react-email/components";
const baseUrl = process.env.VERCEL_URL ? `https://${process.env.VERCEL_URL}` : "";
export interface TriggerWelcomeEmailProps {
name: string;
}
export const TriggerWelcomeEmail = ({ name }: TriggerWelcomeEmailProps) => (
Welcome, {name}!
Thanks for signing up for Trigger.dev! You're now ready to start creating powerful
background jobs and workflows.
You can monitor your jobs, view runs, and manage your projects right from your
dashboard.
To help you get started, check out our{" "}
documentation
{" "}
and{" "}
quickstart guide
.
You can create your first job using our SDK, set up integrations, and configure triggers
to automate your workflows. Take a look at our{" "}
examples
{" "}
for inspiration.
Join our{" "}
Discord community
{" "}
to connect with other developers and get help when you need it.
We're here to help you build amazing things. If you have any questions, check out our{" "}
documentation
{" "}
or reach out to us on Discord.
— The Trigger.dev teamTrigger.dev Inc.
);
export default TriggerWelcomeEmail;
const main = {
backgroundColor: "#0E0C15",
fontFamily:
'-apple-system,BlinkMacSystemFont,"Segoe UI",Roboto,"Helvetica Neue",Ubuntu,sans-serif',
};
const container = {
backgroundColor: "#1D1B27",
margin: "0 auto",
padding: "20px 0 48px",
marginBottom: "64px",
};
const box = {
padding: "0 48px",
};
const hr = {
borderColor: "#2D2B3B",
margin: "20px 0",
};
const paragraph = {
color: "#E1E1E3",
fontSize: "16px",
lineHeight: "24px",
textAlign: "left" as const,
};
const anchor = {
color: "#A78BFA",
};
const button = {
backgroundColor: "#7C3AED",
borderRadius: "6px",
color: "#fff",
fontSize: "16px",
fontWeight: "bold",
textDecoration: "none",
textAlign: "center" as const,
display: "block",
width: "100%",
padding: "12px",
};
const footer = {
color: "#9CA3AF",
fontSize: "12px",
lineHeight: "16px",
};
```
And then to trigger the email, you can use the following task:
```tsx trigger/triggerWelcomeEmail.tsx theme={"theme":"css-variables"}
import { logger, task } from "@trigger.dev/sdk";
import { Resend } from "resend";
import TriggerWelcomeEmail from "emails/trigger-welcome-email";
// Initialize Resend client
const resend = new Resend(process.env.RESEND_API_KEY);
export const sendEmail = task({
id: "trigger-welcome-email",
run: async (payload: { to: string; name: string; subject: string; from?: string }) => {
try {
to: payload.to,
});
const { data, error } = await resend.emails.send({
// The from address needs to be a verified email address
from: payload.from || "email@acmeinc.com", // Default from address
to: payload.to,
subject: payload.subject,
react: ,
});
if (error) {
logger.error("Failed to send email", { error });
throw new Error(`Failed to send email: ${error.message}`);
}
logger.info("Email sent successfully", { emailId: data?.id });
return {
id: data?.id,
status: "sent",
};
} catch (error) {
logger.error("Unexpected error sending email", { error });
throw error;
}
},
});
```
## Troubleshooting
If you see this error when using `react-email` packages:
```
reactDOMServer.renderToPipeableStream is not a function
```
See our [common problems guide](/troubleshooting#reactdomserver-rendertopipeablestream-is-not-a-function-when-using-react-email) for more information.
## Learn more
### React Email docs
Check out the [React Email docs](https://react.email/docs) and learn how to set up and use React Email, including how to preview your emails locally.
Pre-built components you can copy and paste into your emails.
Extensive pre-built templates ready to use.

 This is just a simple implementation, you can customize the email to be as complex as you want. Check out the [React email templates](https://react.email/templates) for more inspiration.
## Testing your task
To test this task in the [dashboard](https://cloud.trigger.dev), you can use the following payload:
```json theme={"theme":"css-variables"}
{
"to": "recipient@example.com",
"name": "Jane Doe",
"message": "Thank you for signing up for our service!",
"subject": "Welcome to Acme Inc."
}
```
## Deploying your task
Deploy the task to production using the Trigger.dev CLI `deploy` command.
## Using Cursor / AI to build your emails
In this video you can see how we use Cursor to build a welcome email.
We recommend using our [Cursor rules](https://trigger.dev/changelog/cursor-rules-writing-tasks/) to help you build your tasks and emails.
#### Video: creating a new email template using Cursor
#### The generated email template
This is just a simple implementation, you can customize the email to be as complex as you want. Check out the [React email templates](https://react.email/templates) for more inspiration.
## Testing your task
To test this task in the [dashboard](https://cloud.trigger.dev), you can use the following payload:
```json theme={"theme":"css-variables"}
{
"to": "recipient@example.com",
"name": "Jane Doe",
"message": "Thank you for signing up for our service!",
"subject": "Welcome to Acme Inc."
}
```
## Deploying your task
Deploy the task to production using the Trigger.dev CLI `deploy` command.
## Using Cursor / AI to build your emails
In this video you can see how we use Cursor to build a welcome email.
We recommend using our [Cursor rules](https://trigger.dev/changelog/cursor-rules-writing-tasks/) to help you build your tasks and emails.
#### Video: creating a new email template using Cursor
#### The generated email template
 #### The generated code
```tsx emails/trigger-welcome-email.tsx theme={"theme":"css-variables"}
import {
Body,
Button,
Container,
Head,
Heading,
Hr,
Html,
Img,
Link,
Preview,
Section,
Text,
} from "@react-email/components";
const baseUrl = process.env.VERCEL_URL ? `https://${process.env.VERCEL_URL}` : "";
export interface TriggerWelcomeEmailProps {
name: string;
}
export const TriggerWelcomeEmail = ({ name }: TriggerWelcomeEmailProps) => (
#### The generated code
```tsx emails/trigger-welcome-email.tsx theme={"theme":"css-variables"}
import {
Body,
Button,
Container,
Head,
Heading,
Hr,
Html,
Img,
Link,
Preview,
Section,
Text,
} from "@react-email/components";
const baseUrl = process.env.VERCEL_URL ? `https://${process.env.VERCEL_URL}` : "";
export interface TriggerWelcomeEmailProps {
name: string;
}
export const TriggerWelcomeEmail = ({ name }: TriggerWelcomeEmailProps) => (